Object snaps are a means of electronically selecting points on drawn objects with absolute accuracy without having to be over the point to be used.
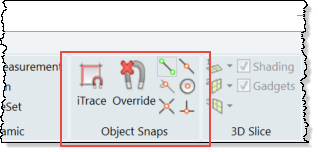
There are several snap options available:
· End -End point
· Near - Nearest point
· Int - Intersection point
· Mid - Mid point
· Cen - Centre point
· Perp - Perpendicular Point
· Override - Temporarily disable all snaps
· iTrace - Measure by intelligent snapping
If an object snap is selected in the ribbon group then it means it is enabled and will be acted upon when measuring. One or more snaps can be enabled at the same time. In the above example both End Point and Intersection snaps are On, all others are Off.
It is essential that good use is made of these tools otherwise the measurements made will not be much more accurate than traditional methods using hand/eye/scalerule coordination.
If multiple snaps are enabled the system will use the point that most closely matches one of the snap options. E.g. if the End Point and Mid Point snaps are on and the cursor is hovering over a line, as the cursor moves so it is closer to the mid point of the line than an end point, a triangular icon will be displayed at the mid point to indicate if the left mouse button was clicked now, that it is the measurement point that would be used.
The use of Snaps is transparent. This means they can be turned ON or OFF in the ribbon whilst in a measurement operation (for example, Single length) without cancelling that operation.
Override
If measuring and you want to temporarily turn all the snaps OFF whilst you pick some measurement points select the Override option in the Object Snaps group.

To restore the snaps previously enabled select the Override option again to toggle the snaps back ON.
End Point Snap
The End Point snap will pick the closest End point of any line, arc, polyline or spline in the drawing by simply hovering over the drawn object. A blue square icon will be displayed at the qualifying end point.
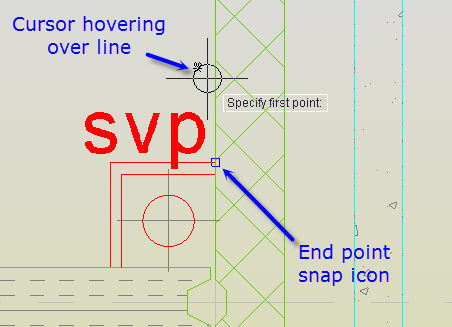
Example of the End Point Snap
Near Point Snap
The Near Point snap is normally used when none of the other snap options are suitable. It picks a point on any geometry at the point nearest to the cursor and displays a blue diamond icon. The user has no control over whereabouts on the geometry it is picking, other than safe in the knowledge that the point picked is definitely touching the object. A blue diamond icon will be displayed at the qualifying point.
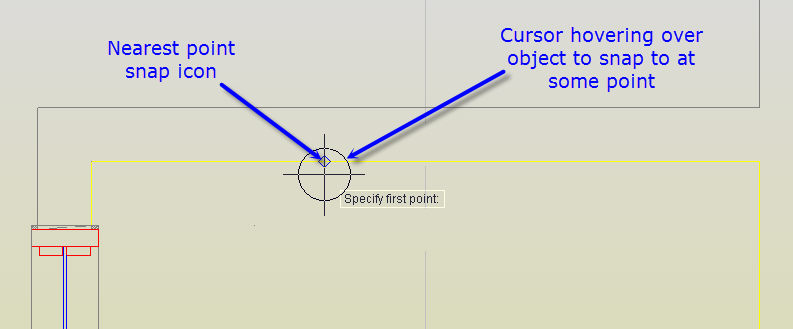
Example of the Near Point Snap
Intersection Snap
The Intersection snap will pick the point where any objects meet or cross. In this instance the cursor has to hover over the potential intersection of lines in order for a blue, diagonal cross icon to be displayed at any qualifying intersections.
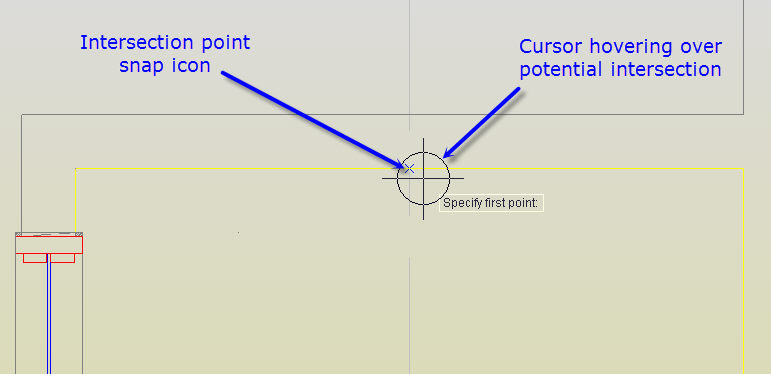
Example of the Intersection Snap
Midpoint Snap
The Midpoint snap will pick the point that is at the halfway point along a line or arc by simply hovering over the target object. A blue, triangle icon will be displayed at the qualifying point.
As can seen in the screen shot below, the points being returned by the snaps might not always be the ones expected. In this instance just a short line had been drawn to 'close off' the end of the wall drawn vertically up the sheet. Therefore the actually mid-point of the top line of the horizontal wall cannot be accurately obtained due to the way the wall has been drawn.
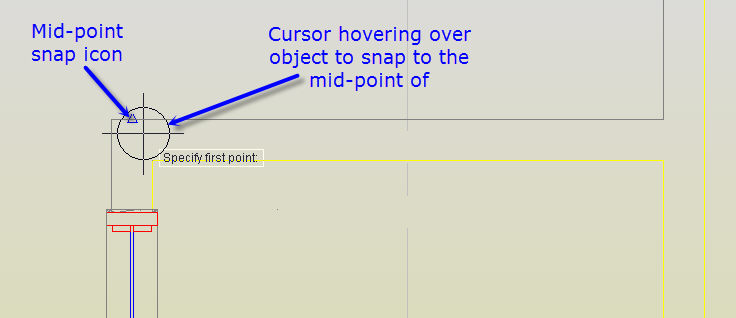
Example of the Mid-point Snap
Centre Snap
The Centre snap will pick the point that is at the centre of a circle or arc object simply hovering over the target object. A blue, circle icon will be displayed at the qualifying point.
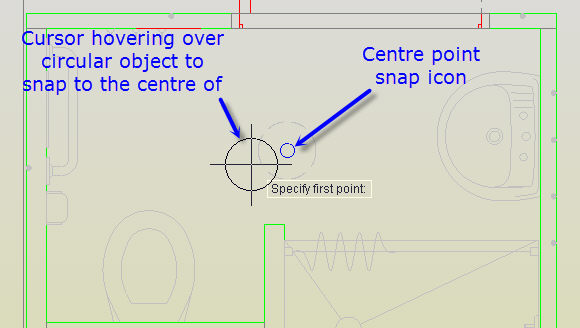
Example of the Centre Point Snap
Perpendicular Snap
The Perpendicular snap will pick a point along the line of the target line object that is perpendicular to that line by simply hovering over the target line. A blue right angle icon will be displayed at the qualifying point.
Note: The perpendicular snap is not used on starting or first points, it is only comes into effect when used for 'next' points. In addition the perpendicular point does not have to be physically on the target line.
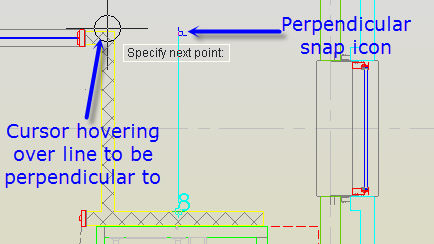
Example of Perpendicular Point Snap
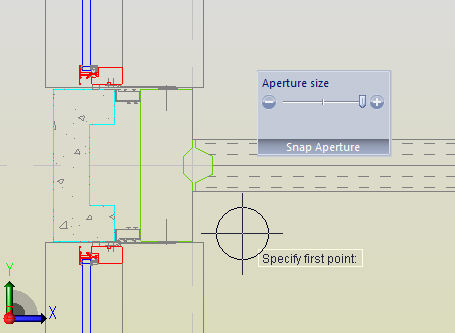
Snap Aperture
Whether or not an object is used to return the qualifying snap points as the cursor is moved around the screen is controlled by the Aperture setting.
When selecting a measurement point a circular target area is displayed around the cursor crosshairs. If an object is partially within the target area then any potential qualifying points will be selected via the snap icons.
To change the size of the target area aperture:
Select ribbon: Settings > slider: Aperture size.
Sliding to the left will reducing the size of the aperture meaning that less items will be caught in the target area.
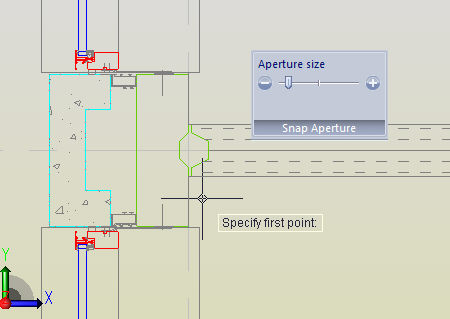
Example of a Small Aperture Setting
Sliding to the right will increase the size of the aperture meaning that more items will be caught in the target area.
The Aperture at its Maximum Size