
iTrace snap measurement provides the means to select objects to measure rather than specifying start and end points.
As the cursor is moved or, 'rolls' over drawn objects the qualifying ones are selected (for example, a line would be selected but text would not). When an object to be measure is selected, it is clicked to add it to the selection set of objects being measured and this is repeated until all the objects have been selected. Selecting the lines defining the walls of a room would be a typical example.
The use of the iTrace snap can be toggled ON or OFF
(iTrace toggle button ![]() ) on the Object
Snaps panel of the Measurement
ribbon (iTrace snaps do not apply to Markup measurements).
) on the Object
Snaps panel of the Measurement
ribbon (iTrace snaps do not apply to Markup measurements).
Note: When iTrace snap is toggled ON, all other snaps modes are disabled (together with a number of other commands) until iTrace snap is toggled OFF when, all the options will be returned to their previous state.
The iTrace mode can be toggled at any time providing that no command is active and that the drawing is in Plan View.
iTrace Snap Measurement supports the measurement of:
· Continuous Length
· Perimeter
· Perimeter Offset
· Irregular Area
· Vertical Area
· Pitched Area
· Volume
The general operation is the same for each measurement type.
Modes and iTrace
The Modes listed below can be used in conjunction with iTrace measurements. It is strongly recommended that Zero Height Mode is set ON
· Add/Deduct
· Notes
· Zero Height Mode
· Repeat
Similarly the Category and Style, set in the Next Measurement options for the different measurement types, will be used when measurements are made in conjunction with iTrace Measurements.
Toggling the iTrace Mode On and Off
To toggle the iTrace mode ON and OFF:
Click the iTrace
toggle button ![]() on the Object
Snaps panel of the Measurements
ribbon.
on the Object
Snaps panel of the Measurements
ribbon.
If the iTrace option is enabled and all the other object snap options are disabled then iTrace mode is ON. Select the option again to turn it OFF and restore the status of the Object Snap options.
Select the type of measure required from the Length and Area/volume groups in the Measurement ribbon.
As the cursor is moved over objects that can be measured they will be temporarily selected in the trace colour of the currently selected Style of the measurement type.
The prompt: Select Start Object: will be displayed by the cursor.

Selecting first objects for Length, Area and Volume Measurements using iTrace
If the object selected is the one to be used, click the left mouse button and the select will become permanent (for the moment).
As with any measurement, a marker and measurement ID will be placed at the start of the measurement. In the case of iTrace measurements they will be placed at the end of the first object selected that is closest to the cursor pick point.
The prompt: Select next object: will be displayed by the cursor.
Following on from one end or the other of the first object select the next object in the measurement sequence. Note that next object to be selected does not have to be connected to the previous one so gaps such as doorways can be 'bridged over'. Also, the object and subsequent select can 'run over' beyond the boundaries of the 'thing', such as a room, being measured, it will be cut back when the next object is selected.
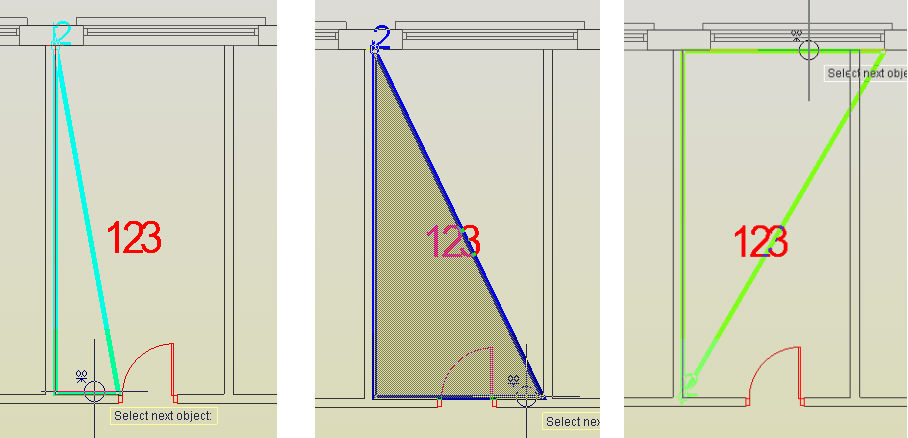
Selecting objects for Length, Area and Volume Measurements using iTrace
Continue to select the objects to be included in the measure. When it gets to the state that sufficient objects have been selected so that the measurement can be closed back to the start point, the final qualifying object will be automatically selected. Either continue to select further objects if the suggested object is not actually required at that moment or, press Return (or right-click) to accept the default and complete the measure. The object selecting will be replaced by the trace line of the measurement style.
Note: Continuous Length and Vertical Area are not closed measurements.
Press the Return key (or right-click) when all the objects have been selected.
Having completed the selection of the objects any additional information for Perimeter Offset, Vertical and Pitched Areas and Volume will be prompted for as detailed elsewhere.
To abort the measurement process at any point press the Esc key.
Completed Continuous Length Measurement using iTrace
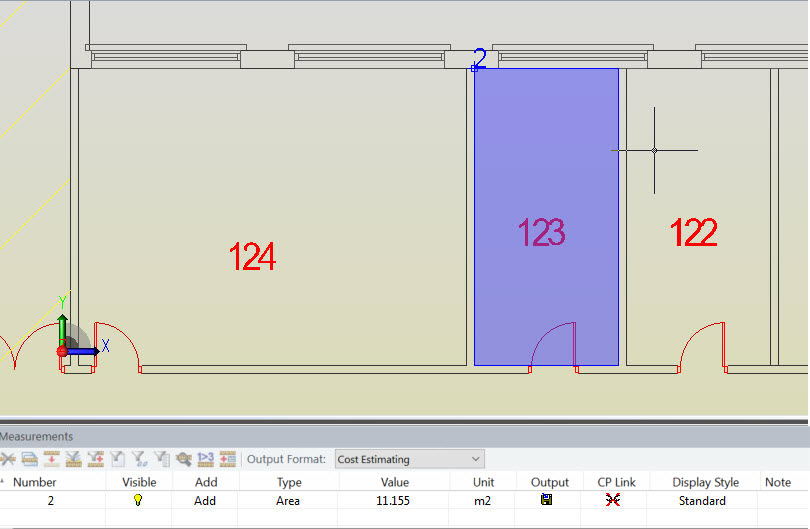
Completed Irregular Area Measurement using iTrace
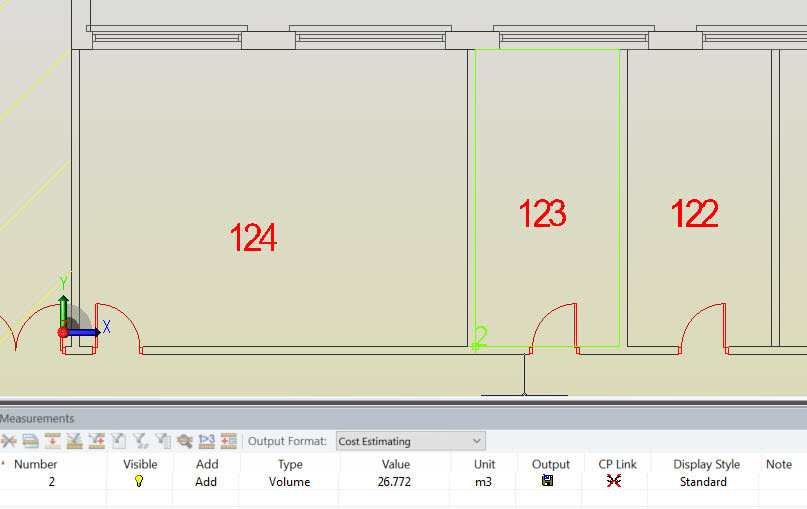
Completed Volume Measurement using iTrace