Administrators can configure the header fields and line-level fields that will be displayed in online documents such as requisitions, orders and order acknowledgements.
Administrators can also perform the following configurations:
· Validations required
· Whether a draft requisition can be saved or not
· Enable a requisition to be send on behalf of someone else
· View a list of all POs in a PO Inbox.
· Configure the header and the line level fields to include hire order dates.
· Define different contract codes with different markup percentages for documents
The following procedure explains how you can configure an online document.
To configure the online document, perform the following steps:
1. Click Configuration > Online documents from the Administration tab.
The Online documents - list page is displayed.
2. Click New at the top right of the page to create a configuration for an online document type. For example, Order or Requisition.
The Online documents- Create page is displayed.
3. Select Requisition from the Document type drop-down list.
4. Enter the following details as mentioned in the following table:
Field name |
Description |
Document type |
Select Requisition from the drop-down list. |
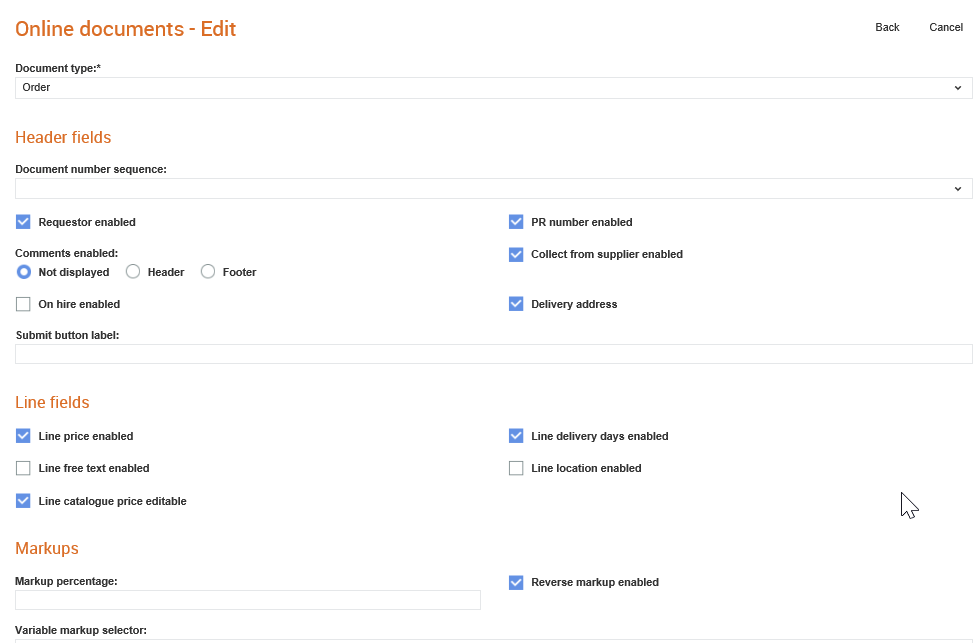
Header fields |
|
Document number sequence |
Select the document reference, which has been previously configured from the Supplier Management Configuration > Reference numbers section for the format of the sequence number from the drop-down list. If selected, upon submission of the requisition, a unique sequential number will be generated in the format specified in the rule. You can configure the prefix and the sequence number length. |
Requestor enabled |
Select this check box if you want to include the Requestor field in the header section of the requisition. This is a free text field to allow the name of a requestor to be entered. |
PR number enabled |
Select this check box if you want the Purchase Requisition (PR) number field in the header section of the requisition. |
Comments enabled |
Select an option to display comments or not and in which section of the requisition. If you do not want the comments to be displayed, select the Not displayed option. |
Collect from supplier enabled |
Select this option to define whether the collection address for each supplier and the sub headings are displayed. |
On hire enabled |
Select this option to allow plant/hire items to be selected. This will then include the on hire fields. When you raise an e-requisition, the On hire date field will be displayed at the header and line sections, as well as the units. |
Delivery address |
Select this option to include the delivery address in the documents. |
Collect from supplier enabled |
Select this check box to include the subheadings and the collection address of the suppliers in the requisition. The locations held against the supplier will be available for selection. |
Line fields |
|
Line price enabled |
Select this check box to display the line price and the automatically calculated totals in the requisition. If this option is not selected, the price columns will be hidden. Users select the quantity, but the price will be taken from the catalogue generated in the background and entered into the requisition automatically. |
Line delivery days enabled |
Select this check box to enable the delivery days to be specified in the requisition. This allows the person raising the requisition to identify the lead time, or number of days required from order to delivery. This is a relative number of days which can be used for verification while processing the purchase order. |
Line free text enabled |
Select this check box to allow non-catalogue items in the requisition. With this option, additional requisition lines can be added when the supplier is selected from the list of potential suppliers and details entered manually in the requisition. |
Line location enabled
|
Select this check box to include locations for suppliers selected from free text (non-catalogue) items at the line level in the requisition. |
Line catalogue price editable |
Select this check box to enable editing of catalogue price at the line level. |
Markups |
|
Markup percentage |
Select this check box to use the specified markup percentage to calculate the total amount. If this option is enabled, the Sell Price column appears on the online requisition form. |
Reverse markup enabled |
Select this check box to use if you want to use the markups defined to calculate the buy price from the sell price. |
Variable markup selector |
Select the online field that will be used to define the markup percentage. |
|
|
Functionality |
|
Validate order sending relationship |
Select this check box to validate whether a trading relationship exists to send purchase orders upon submission with each of the suppliers selected in the requisition. This may be required if an incoming purchase order generated from the requisition will automatically create and send an order to the supplier. The validation of the trading relationship ensures that the order will be able to be sent. |
Validate invoice receiving relationship |
Select this check box to validate whether a trading relationship exists to receive invoices upon submission with each of the suppliers selected in the requisition. This may be required if the resulting order based on the requisition being created will send invoices through Tradex. |
Save drafts enabled |
Select this check box to allow a draft version of the requisition to be saved and worked on later. |
Generate document number on save |
Select this check box to automatically generate a document number while saving a document. |
Email user on save |
Select this check box to let the system to send an e-mail to the user on saving the document. |
On behalf of |
|
"On behalf of" enabled |
Select this check box to send the requisition on behalf of another trading partner. |
"On behalf of" partner's location enabled |
Select this check box to let users select the trading partner's location while sending the requisition. This option appears only if you select Order Acknowledgement as the document type. |
PO Inbox |
|
PO Inbox enabled |
Select this check box if you have the PO Inbox module enabled. This configuration will apply only If you have the module enabled. |
Amend button label |
Defines the label for amending the PO from the PO Inbox. For example, Send back. |
Amended document status |
Defines the status to be applied to the original PO after the amended document is submitted. |
Line price editable |
Select this check box if you want to edit the line-level price. When you select this check box, the following fields will be displayed: · Lower line price tolerance: This the lower limit of the tolerance level set beyond which the unit sell price in the PO cannot be reduced from the original price. An error message will be displayed if the edited price is reduced beyond the tolerance limit set. · Upper line price tolerance: This the higher limit of the tolerance level set beyond which the unit sell price in the PO cannot be increased from the original price. An error message will be displayed if the edited price exceeds the tolerance limit set. |
Line quantity editable |
Select this check box if you want to edit the line-level quantity. |
Line units editable |
Select this check box if you want to edit the line-level units. |
Line delivery editable |
Select this check box if you want to edit the line-level delivery details such as the delivery date of orders. |
Line product code editable |
Select this check box if you want to edit the line-level product codes. |
Line description editable |
Select this check box if you want to edit the line-level description. |
5. Click Save.