A credit note is created when a supplier wants to reverse an original invoice. In such a case, all the values and descriptions should be the same as that of the original invoice.
To create an online credit note, perform the following steps:
1. Click Send > Create online credit from the Document Exchange tab.
The Create online credit - Create page is displayed.
2. Click the Select check box next to the trading partner that you want to create an online credit for, and then click Next.
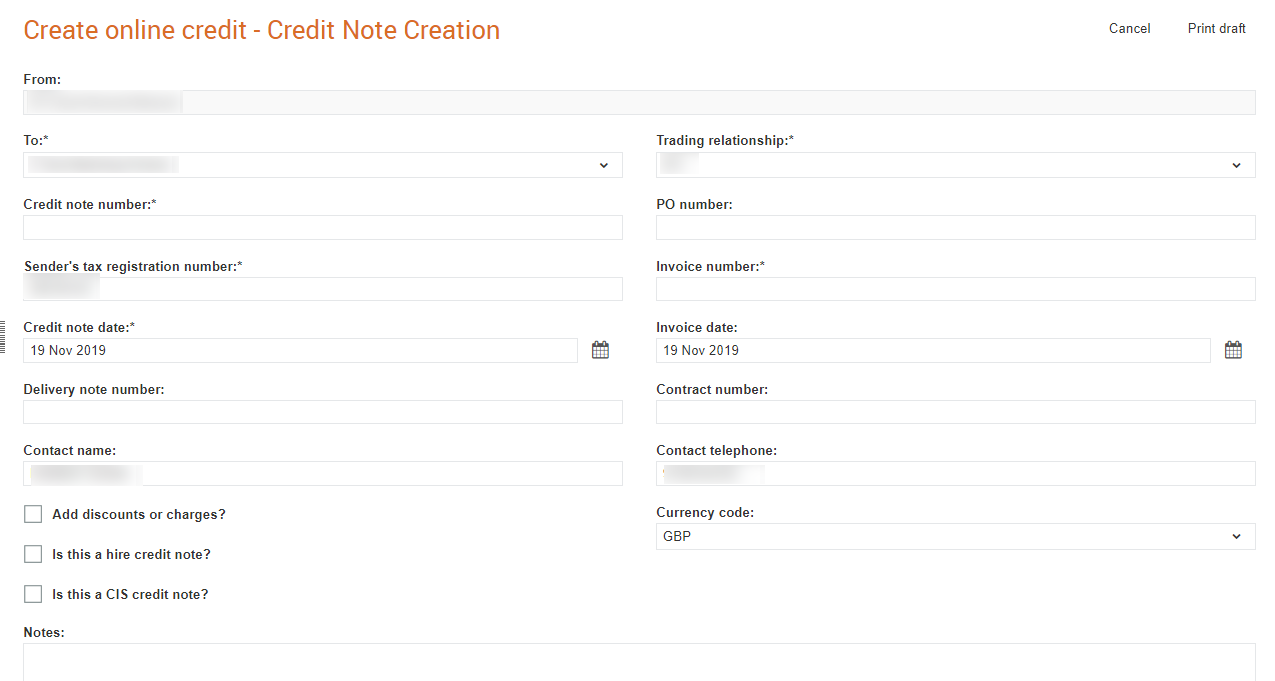
The Create online credit - Credit Note Creation page is displayed.
3. Enter the required details in the credit note, as described in the following table:
Field name |
Description |
Trading relationship |
Select a value from the drop-down list. This is the primary value that is used by the sender to identify the receiver. |
Credit Note Number |
Enter the credit note number. |
PO Number |
Enter the original invoice number. |
Sender’s tax registration number |
The sender’s VAT number. |
Invoice Number |
Enter the number of the invoice to which the credit note applies to. |
Credit Note Date |
The date of the credit note. Change the date if it is not equal to the current date. |
Invoice Date |
The date of the invoice to which the credit note applies to. |
Delivery Date |
The date of delivering the invoice. |
Delivery Note Number |
Enter the reference number from the delivery note if required or available. |
Contract Number |
Enter the reference number for the contract. |
Contact Name |
The contact name for your business. |
Contact Telephone |
The contact phone number for your business. |
Add discounts or charges? |
Select this check box to add discounts and charges in the credit note. |
Is this a hire credit note? |
Select this check box if this is a hire credit note. |
Is this a CIS credit note? |
Select this check box if it is a CIS credit note. |
Currency Code |
The currency code. For example, GBP. |
Notes |
Brief notes on the credit note being created. |
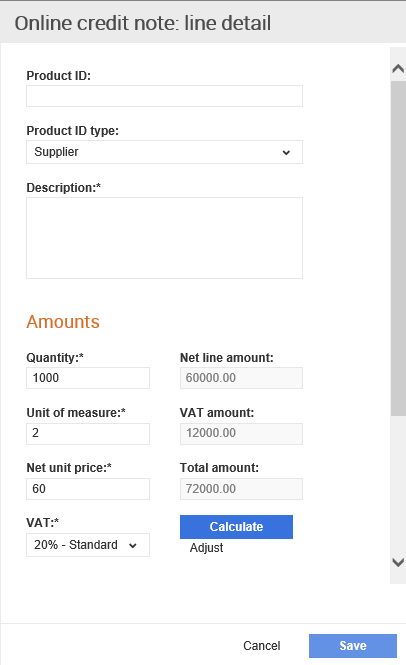
4. Click Add lines if you want to add line level details to the credit note.
If you are using GST, instead of VAT, the GST labels will be displayed.
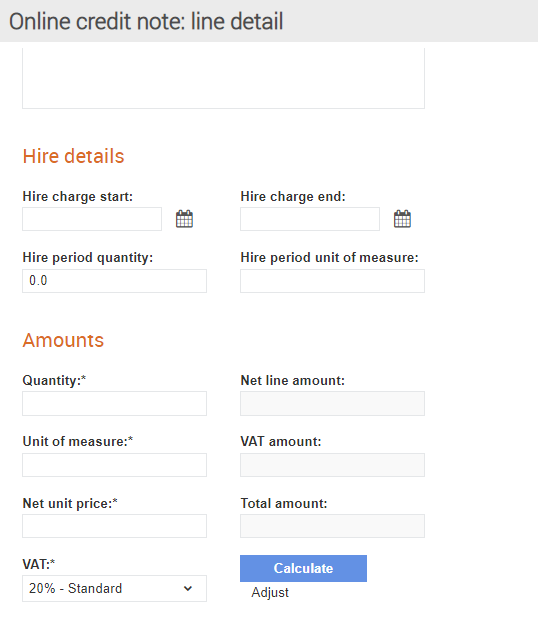
If this is a hire credit note, the following pop-up window will be displayed to include the relevant line details:
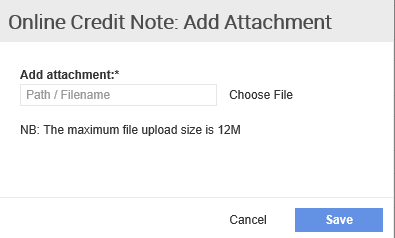
5. Click Add Attachment to add attachments to the credit note that you want to create.
6. Perform any of the following steps:
Click Save to save the credit note and submit it later.
Click Submit to submit the credit note.
Click Print Draft to take a print out and verify the credit note details before submitting it.