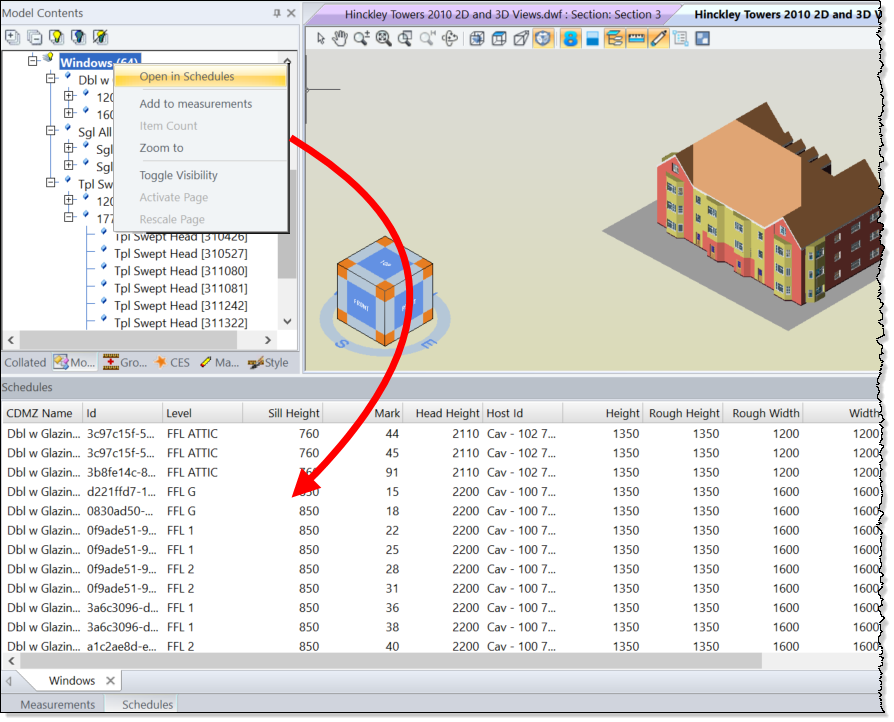
Schedules are created directly from the Model Tree. Right-click at the appropriate level and select Open in Schedules. Whichever level is selected, all subordinate objects will be added to the schedule.

The Level selected in the Model Tree will become the schedule tag name. ('Windows' in the example above).
As all the properties associated with the objects selected will be displayed, the schedule could be quite wide with a lot of unnecessary columns. Only half of the available Windows properties are shown in the following screenshot:
Note: The four standard measurements (length, count, area & volume) will be appended to the right hand end of the schedule.
After the schedule, is created, it can be rationalised by formatting the schedule.
After it is formatted, the schedule will display only those columns required, in the order and sortation required.
The following screenshot shows an example:

Values displayed in the schedule can now be dragged to the measurements tab. For additional information, see Creating measurements from a Schedule.