While importing a Microsoft Excel file, CES can recognise the structured headings, which are present in the source Microsoft Excel file. This is done automatically based on the settings you configure in Fonts tab of the Import dialog box.
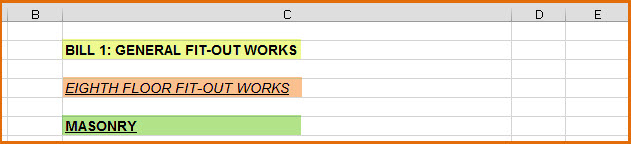
In the following example:
· Heading 1 (Yellow): is a Sub Bill heading and its attributes are Arial, 10, bold
· Heading 2 (Orange): is a Major heading and its attributes are Arial, 10, italic, underlined
· Heading 3 (Green): is a General heading and its attributes are Arial, 10, bold, underlined
To configure the import routine to automatically recognise these headings, perform the following steps:
1. Select a Microsoft Excel file that you wish to import. For more information, see Importing Microsoft Excel Format Files.
The Import dialog box is displayed.
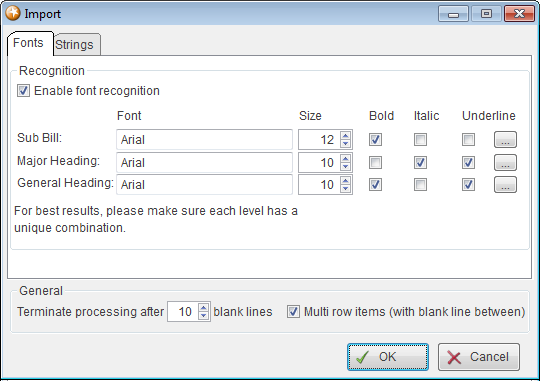
2. Select the Enable font recognition check box.
3. Click the browse
button ![]() to configure the following font settings for
each of the Sub Bill, Major
Heading and General Heading.
to configure the following font settings for
each of the Sub Bill, Major
Heading and General Heading.
· Font
· Size
· Bold
· Italics
· Underline
Note: You must ensure that each level has a unique combination of font formatting.
4. Click OK.
Reference: For additional information on how to use the Terminate processing after blank lines and Multi row items (with blank line between) check boxes, see Step 6 through Step 12 of Importing Microsoft Excel Format Files.