In Tradex, the Managed Email functionality lets you to connect with your trading partners who only receive documents. These partners may not want to receive documents into their back office systems through Tradex in a file format, or they do not want to set up a direct link to Tradex. For such trading partners, Tradex can be used to send the documents to these partners by e-mail.
To send documents, you must enter the company’s details and a valid e-mail address of the receiving partner in Tradex.
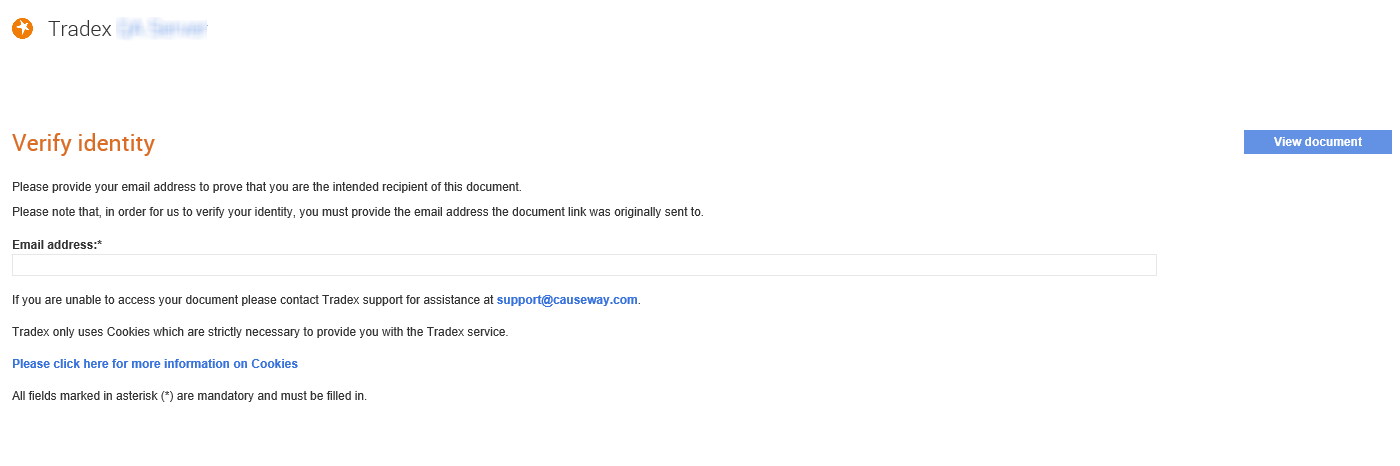
The managed e-mail users through Doclink must enter an e-mail address after clicking the link sent to view the documents. The document links received by the managed e-mail users will be deactivated a month after the users have viewed the documents.
When the managed e-mail users click the link in the e-mail received, the following Verify identity page is displayed:
Enter the registered e-mail address in the Email address field displayed, and then click the View document button at the top right of the page to view the document received.
You must also ensure that the default transport method that you configure for these trading partners is Email. For more information on configuring the default transport types, see Configuring Default Download Transports.
Note: To customise the managed e-mail template using the Markdown language, see Using Markdown for more information.
To configure the managed e-mail templates, perform the following steps:
1. Click Download Options > Managed e-mail templates from the Administration tab.
The Managed email templates – list page is displayed.
2. Click New Template.
The Managed email templates - Create page is displayed.
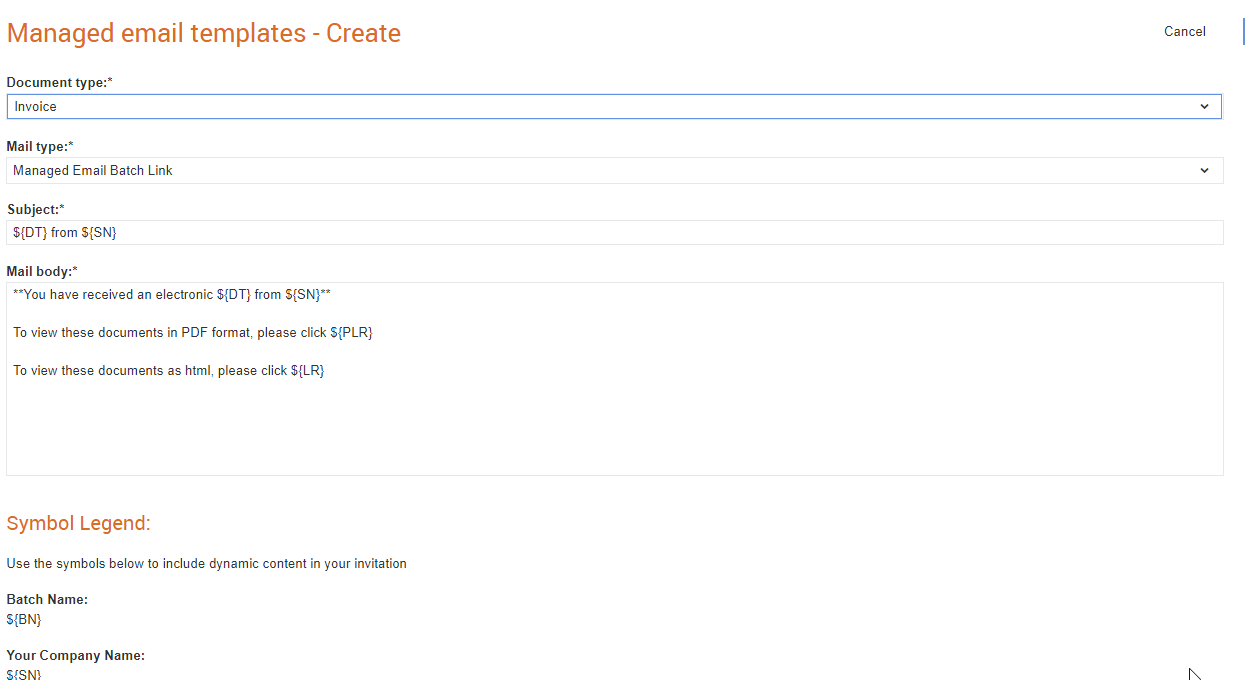
3. Select the type of document for which you are creating a template in Document type.
4. Select an option from the Mail type drop-down list. For example, Managed Email Doc Link.
5. Edit or accept the e-mail subject in the Subject field from the symbol legends displayed.
6. Enter the body text of the e-mail message in the Mail Body text box.
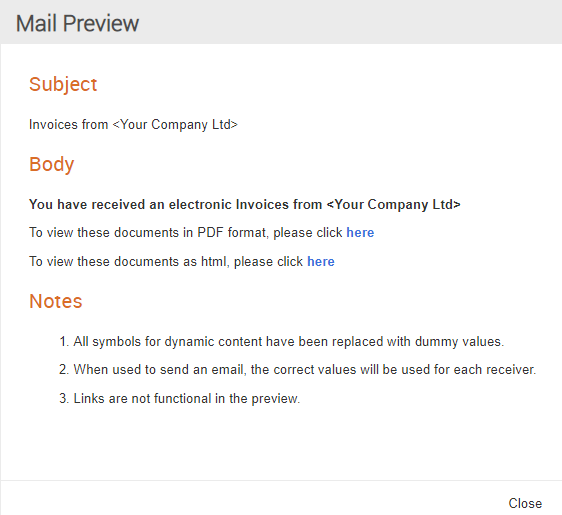
7. Click Preview to see a preview of the new e-mail template you have created, and then click Close.
The following figure is a sample preview of the managed e-mail template:
8. Click Save to save the template you have created, or click Previous to further edit the template.