The Tradex PDF Mapping Template allows a company to send a PDF copy of an invoice or order to Tradex and convert that document to a data file for the relevant recipient. The PDF documents can either be manually loaded through the Tradex web page or sent through e-mail to the configured email address.
You can upload up to three PDF documents into a single PDF upload mapping and also map multiple PDF documents into a single PDF upload mapping. Tradex also allows mapping of header details at the line level while uploading PDF documents.
If the document created by the template has a different value than the value specified for the document type on the template, then the system will try to create a document using the next template in the sequence, until there are no templates available to use.
Note: While uploading the PDF documents, administrators can prepend text from a zero-value line on to the next line so that text can be added to the most appropriate line without the help of post processors.
Suppliers that send a sufficient volume of invoices (for example, at least 300/year) that they do not wish to key in to Tradex Portal and are not able to (or do not wish to) take up a full connection sending the invoices as data files.
A company that sends PDF documents in is normally set up as a Portal user. This allows the sender to either send the PDF documents through e-mail (ten or so at a time as most e-mail servers find more than this as troublesome), or, if preferred, to upload the documents manually.
You can set up Transmission reports in Tradex to perform the following. For more information, see Configuring Transmission Reports.
· Tell the sender whether any invoice failed to upload
· To know whether any invoice was rejected by the receiver (depending on their business rules set up)
· To know how many documents have been sent successfully
To map PDF documents using a PDF Mapping Template, ensure that the invoice is a readable PDF document, and it consists of the following mandatory fields, as shown in the table:
Note: Mandatory fields for an invoice are listed in bold text; however, all the other fields in most cases are required.
Header Section |
Line Details |
Footer section |
Document type: This information can be added (hard-coded) if it is not present. |
Item code
|
Net total
|
Invoice number
|
Quantity
|
Carriage charge if any sent.
|
Invoice date |
Description
|
Vat amount
|
Order number |
VAT rate
|
Gross total |
Account number |
VAT type
|
|
Vat no, this can be sent in either header or footer section |
VAT amount
|
|
Sender name and address |
Item price
|
|
Buyers name and address
|
Total line amount |
|
Delivered to address?
|
|
Note: The best way to check if the PDF document is suitable for mapping is to open the PDF document, press Ctrl+F on the keyboard, and search for a word that appears on the invoice. If the whole page turns blue, then this is not a suitable and readable PDF. If the word is found and highlighted on its own in blue, then it is a readable PDF document.
To set up a template for PDF document mapping, perform the following steps:
1. Click Upload Options > PDF Upload Options from the Administration tab.
The PDF upload options – list page is displayed.
2. Click the New button at the top right of the page to create a PDF document template.
The PDF upload options - Create page is displayed.
3. Enter the following details in the fields displayed:
Header Section |
Line Details |
Document type |
Select the type of document from the Document Type drop-down list. Since the mapping is for an invoice, enter Invoice. |
Template Name |
Enter Invoice in this field to default this as an invoice PDF template. If you are using multiple templates, define them accordingly. For example, you may add a date to the additional invoice template name. |
Filename rule
|
Enter a full or partial file name or regular expression in the Filename rule field. This value must match the file name of documents uploaded using the automatic method. If you try to upload a file name different from that what is specified here, then the mapping may not be applied. You can also leave the field blank. |
Sequence
|
This is the sequence by which the system (Tradex) will read the templates if you have defined multiple PDF mapping templates. It is recommended that you do not change the default value in this field. |
Decimal place character |
It is recommended that you accept the default value displayed in this field. |
Delimiter values |
This defines a list of values to split fields by. For example, commas or full stops. |
Contiguous distance |
This is the width between closely grouped words in the same line of an invoice. This is used when the fields in the line details are too close together. It is recommended that you accept the default value in this field. |
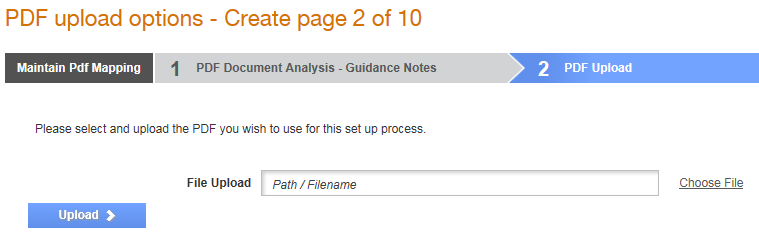
4. Click Choose file to select a PDF document that contains most of the fields that are required for mapping, and then click Upload to upload that file.
5. Click Next to set rules that will be used to interpret your documents such as the label fields and data fields.
This is the first of the actual mapping pages and the mapping is split into two sides: the labels on the left and the data fields on the right.
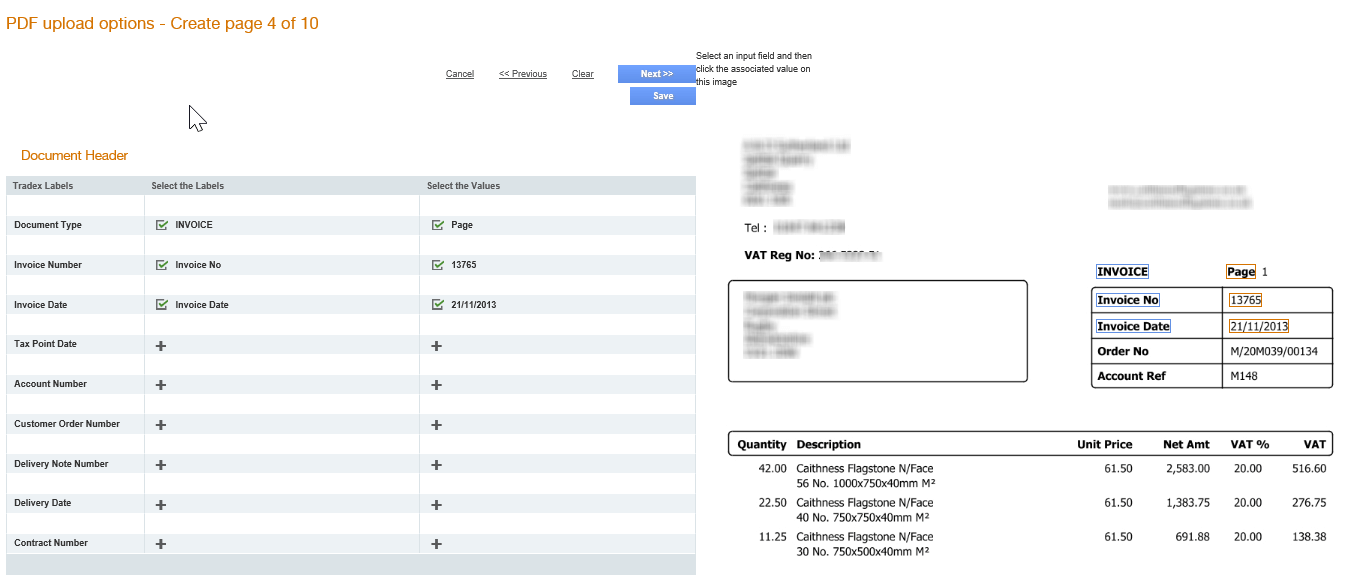
6. Click the plus
icon ![]() next to the value or label field (on the left of
the page) to map the values, and then click the PDF on the right or select
the drop-down on the left side.
next to the value or label field (on the left of
the page) to map the values, and then click the PDF on the right or select
the drop-down on the left side.
This means that the mapping can be as easy as simply clicking on the field that needs mapping and then selecting the corresponding field from the PDF.
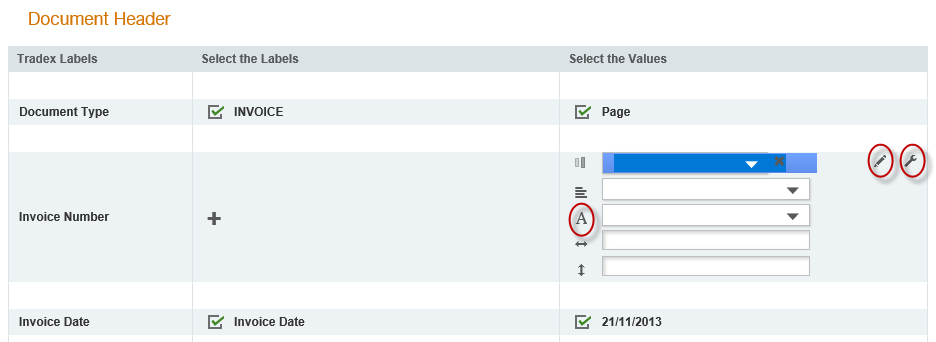
7. Use the following icons or field if the required data is not there, or if the label and data are displayed together.
· Pencil
icon: The pencil icon (![]() )
allows hard coding in fields where the data will always be the same. This
allows us to hard code fields that will always stay the same, but may
not be present on the PDF uploaded. For example, the sender's name and
address is often sent as part of the logo of the company and cannot be
mapped in. With the pencil icon, you can add such fields to the template.
)
allows hard coding in fields where the data will always be the same. This
allows us to hard code fields that will always stay the same, but may
not be present on the PDF uploaded. For example, the sender's name and
address is often sent as part of the logo of the company and cannot be
mapped in. With the pencil icon, you can add such fields to the template.
· Spanner
icon – The spanner (![]() ) icon
allows you to clean data and display only what is required. Sometimes
data cannot be mapped in the exact way it is present on the PDF. For example
if a date format is incorrect, or if a VAT amount includes the word VAT. The Spanner icon allows
us to use Regular Expressions
in the field to make sure that the text is read in a certain way or only
of a certain type. This is not used for every invoice, but in those where
the date format is incorrect or to perform little tweaks like this. For
more information on regular expressions and the most commonly used logics
used, refer to this online cheat sheet.
) icon
allows you to clean data and display only what is required. Sometimes
data cannot be mapped in the exact way it is present on the PDF. For example
if a date format is incorrect, or if a VAT amount includes the word VAT. The Spanner icon allows
us to use Regular Expressions
in the field to make sure that the text is read in a certain way or only
of a certain type. This is not used for every invoice, but in those where
the date format is incorrect or to perform little tweaks like this. For
more information on regular expressions and the most commonly used logics
used, refer to this online cheat sheet.
· A Field: This field is the type override. If a field that is mapped is numeric on the sample PDF, Tradex will treat the field as a numeric field. If the field could potentially also contain Alpha characters (for example, a PO Number or an Item Number) this function can be used to override this field type.
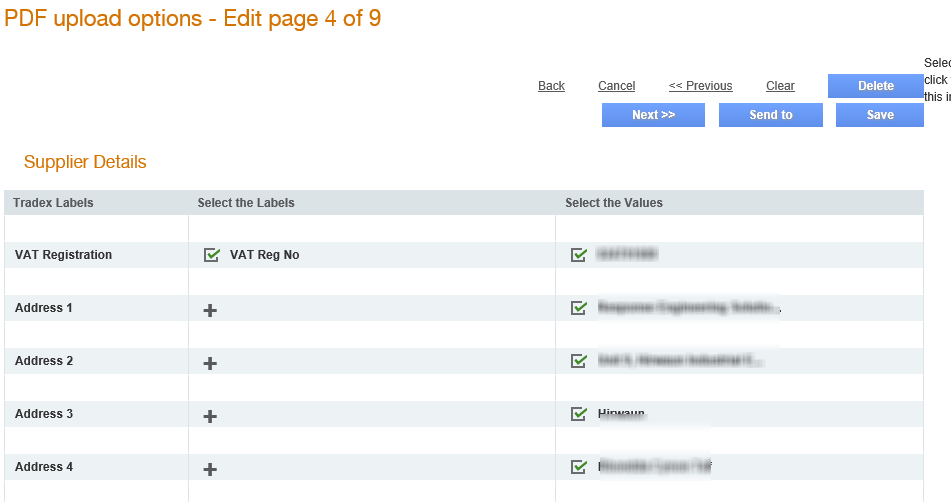
8. Click Next to map the supplier details, as mentioned in step 6. Enter the details of the sender along with the VAT details.
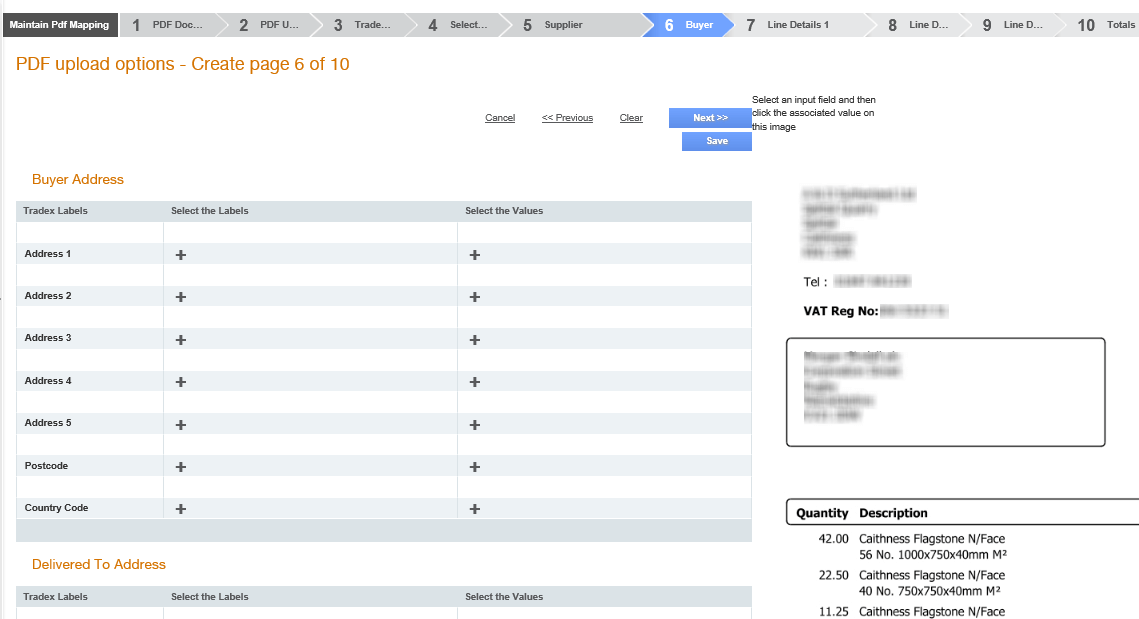
9. Click Next to map the buyer's address details, such as the receiver's name and address of the invoice, along with the delivered to address if present.
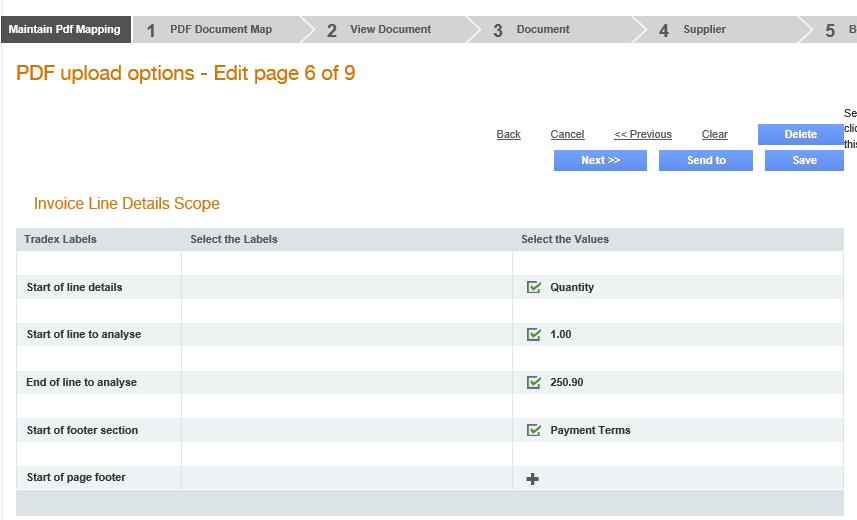
10. Click Next to map the line details in such a way that if the invoice is larger than one page, then the invoice page will break and will continue on to the next page. To achieve this, the labels are used for the start of line details and the actual data is used as the start of line to analysis, This is so when the invoice is longer than one page that it allows the invoice to have a page break and start reading a second page.
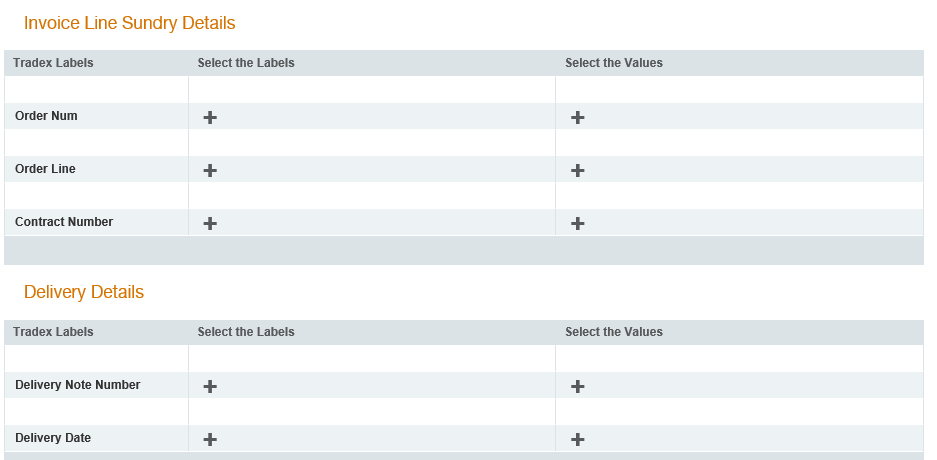
11. Click Next to map the delivery details. For a sales invoice, the delivery date and delivery note number are mapped in here. For a hire invoice, map the hire to and hire from dates (if they are not sent at the header level). A template will need to be mapped for both hire and sale if both types of invoice are sent as well as a separate template for credit notes.
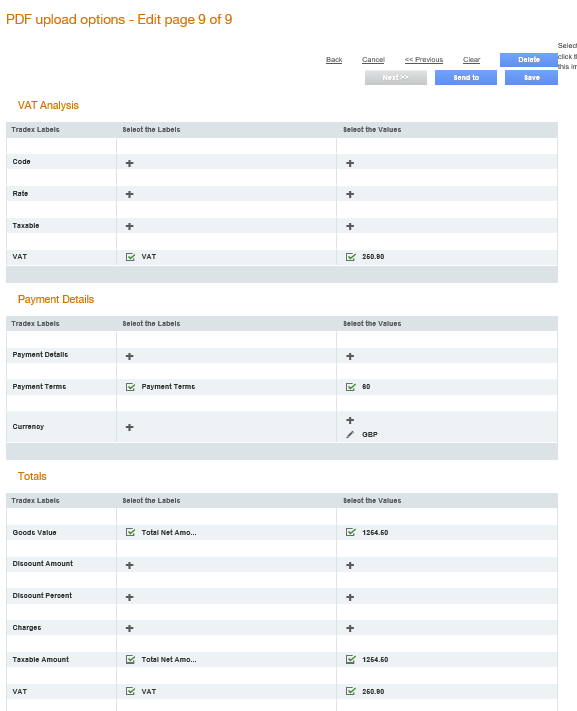
12. Click Next to map the VAT Analysis details, Payment Details, Totals, and Early Settlement Discount details.
You can edit the mapping on any of the pages at any time by clicking the tabs at the top of the page. These tabs will display different numbers depending on whether you are creating a template or viewing a previously completed one.
13. Click Save to save the details and to return to the PDF upload options – list page.
After you have created the PDF template, go to the PDF upload options – list page, and then click the PDF template that you have created. Upload a PDF to verify whether the fields have been mapped correctly.
Click the Document View tab and then click the View button to view the invoice layout based on the fields that were mapped in.
Once the PDF mapping template has been created, then the next step is to create the trading relationship within Tradex.
While creating the trading relationship, the Receiver ID will need to match the account number or name that is mapped into the account field on the PDF template document.
For more information, see Creating New Trading Relationships.
· If you have a staging environment, always map the unknown PDF documents in the staging environment, instead of the live environment.
· Receivers may not wish to receive alphanumeric characters that can be lumped together in the string of the VAT number. Use the spanner icon, after mapping the fields normally, to enter the numbers [0-9] manually to display the numeric values only.
![]()
· When editing a PDF template, save a copy of it first (this can be done by opening the mapping template and saving it in a new name). This will ensure that the original copy is not affected, in case you encounter problems while mapping the PDF documents for the first time.
· When mapping fields in the Totals section, you will need to use the net amount/good amount in the Taxable Amount field. While mapping the Taxable Amount with the Total Amount field in the PDF, you will notice that the field shows a random number. You will have to click the random value and click the Total Net Amount value in the PDF again to correctly map the amount.