The following steps are involved in creating a trading relationship in Tradex:
1. Select the trading partner, document type and relationship type.
2. Provide the sender’s or the receiver's details: Define the account code by which your company knows the trading partner, your e-mail address for communications and the date when you want trading to start. In this step, you can verify the contact information for your proposed trading partner. You can also enter notes, general textual information that can be shared with your trading partner.
Note: Some companies use the ‘sub id’ function when they have multiple codes to identify a trading partner.
3. Assign the view, send and create online document creation permissions.
The Select All option is available if you want to assign permissions to all users. After user permissions are assigned, an invitation will be e-mailed to your intended trading partner. The partner will also see the invitation as a notification when they log on to Tradex.
To create new trading relationships, perform the following steps:
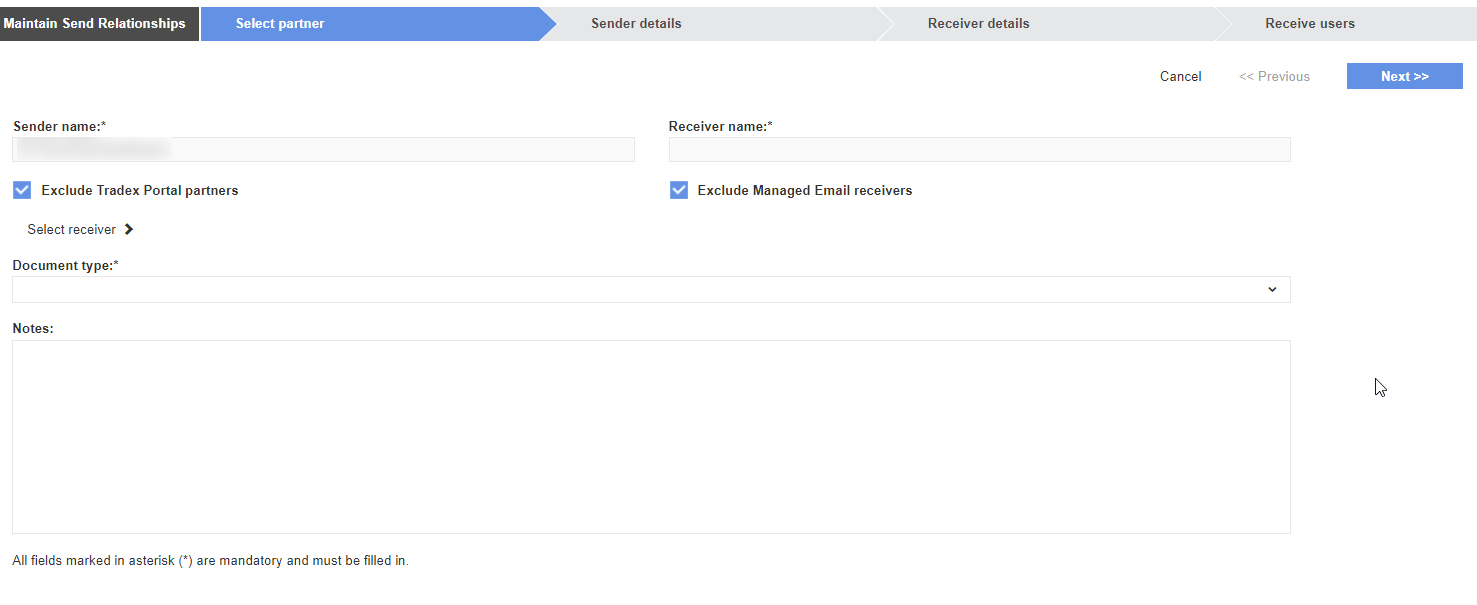
1. Click Trading Relationships > Sending relationships from the Document Exchange tab.
The Maintain Send Relationships page is displayed.
2. Select the following check boxes if you want to exclude the following partner types:
· Exclude Tradex Portal partners
· Exclude Managed Email partners
3. Click Select Receiver and select a trading partner from the list displayed in the Select Partners pop-up window.
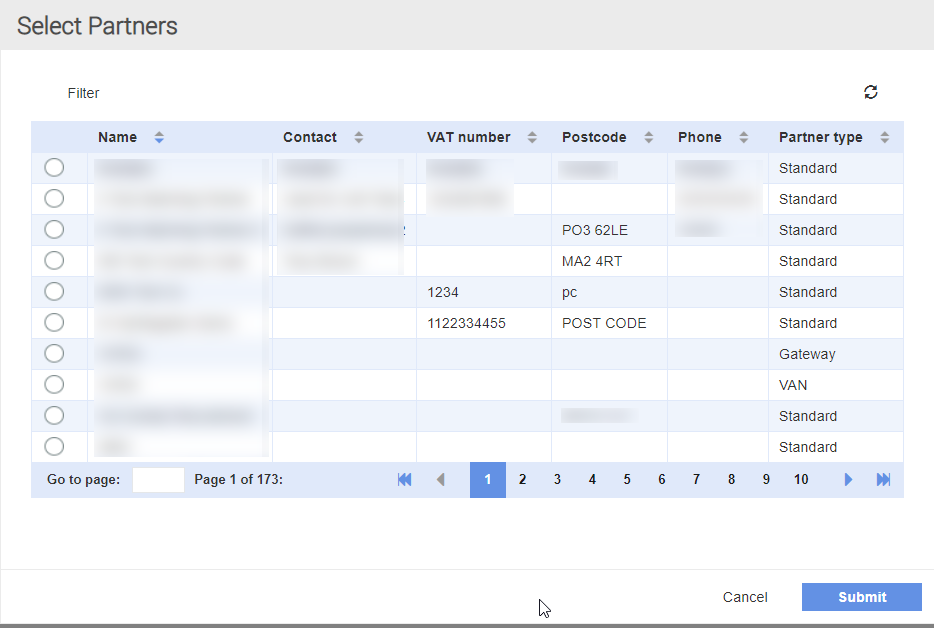
3. Click Submit so that the selected receiver is displayed automatically in the Receiver name field.
4. Select a document type such as Invoice or Order from the Document type drop-down list.
5. Enter notes in the Notes area, and then click Next.
6. Perform the following tasks on the page that is displayed:
· Verify or edit the sender and receiver details. Select the Sender details complete check box if the sender details are complete.
· Enter the primary ID that is used to identify the receiver in the Receiver ID field and the secondary value to be used to identify the receiver in the Sub ID for Receiver field
7. Enter notes for the receiver in the Notes area.
8. Click Save.
An invitation will be e-mailed to your intended trading partner and a status page is displayed. When the partner logs on to Tradex, a notification is displayed.
This trading relationship will also be displayed on the Maintain Send Relationships page. You can select the new trading relationship and enter additional details such as additional receiver IDs and assign permissions to users that you select. A red indicator beside a trading relationship shows that the receiver has not completed the details. A green indicator shows that the receiver has completed all the details required.
For more information on adding additional details, see Sending Trading Relationships. For information on adding extra receiver IDs, see Using Extra Receiver IDs.
Note: When documents are rejected due to some reason, the document rejection e-mails will be sent to the sender's e-mail address specified on the trading relationship details. If the sender's e-mail address is not specified in the trading relationship details, the e-mails will be sent to the sending partner's e-mail address.