
This topic covers:
· Set up
· Creation and population
o Sequence of operations
o Multiple row selection
· dimsheet Times Column
· dimsheet Factor
· dimsheet Units and the Dimension column
· Vertical or Horizontal dimsheets
Set up
In CADMeasure, have the drawings to measure from open and saved in a session. Open the Cost Plan associated with the drawing(s) and the Element Levels displayed on the Elements tab of CATO Panel. The dimsheet panel must be enabled and optionally displayed separately to the element levels as described in Arranging the dimsheet Panel. Build up the Element Levels as required. See topic Building up the Element Levels in CADMeasure. Ensure the Output Format in the Measurements grid header is set to CATO Cost Planning.

Create and Populate
To create and populate a dimsheet in CADMeasure
1. Take a measurement
2. Highlight the Element Level to which a dimsheet is to be added
This will display a blank Dim Sheet panel
3. Drag and drop the measurement from the Measurements grid into the Dim Sheet panel
This will create the dim sheet for the element level and populate the Dim Sheet panel
As more measurements are added to the DIM sheet the result for each entry will be extended out in the 'Returned Value' which will update the value in the Element listing. Individual dimsheet entries can be 'Timesed' with the multiplied up value being extended through to the 'Returned Value'. The total value from the content of the dimsheet can be 'Factored', the effect of which will be shown in the 'Returned Value'.
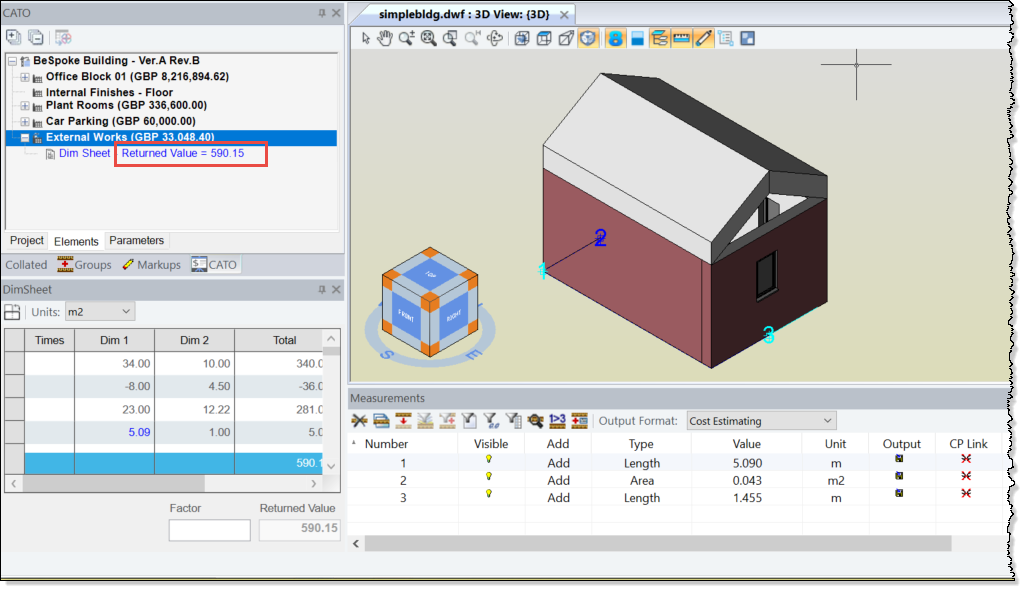
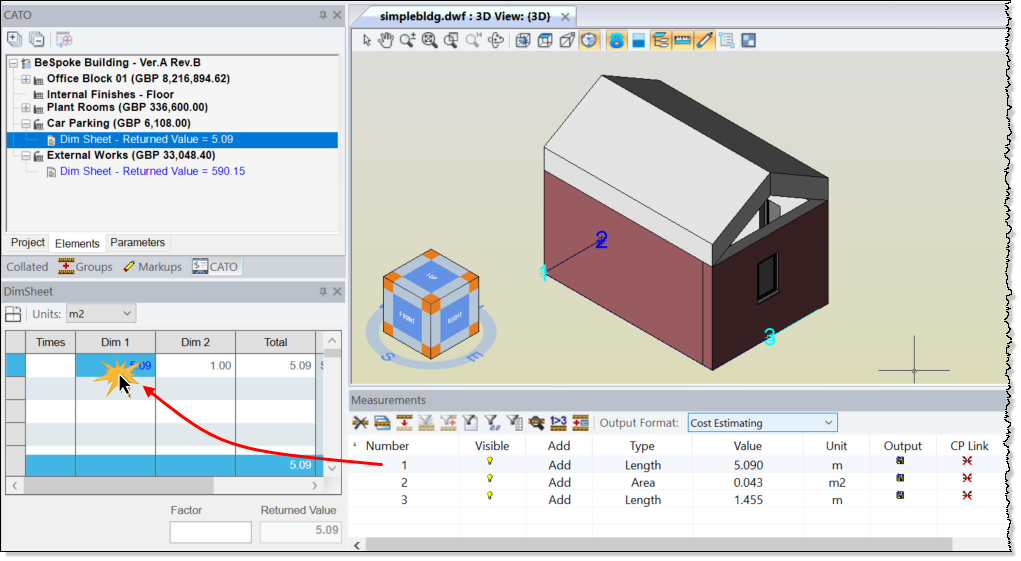
Note: The name of the CADMeasure session file from which the measurement was taken is listed in the dimsheet together with the Note assigned to the measurement.
Continue to take measurements and drag and drop from the Measurements grid onto the Dim Sheet as required.
Sequence of operations
The sequence can be mixed and matched to suit your style of working.
For example, all the measurements could be taken to start off with, grouping them where appropriate. The Element Levels could then be created and then the measurements dragged and dropped onto the Element Level Dim Sheet panels.
Alternatively, a particular Element Level, such as Internal Floor Finishes, could be dealt as a complete element. As each child level is created the measurements could be taken and used to create and populate the DIM Sheets.
Mutliple row selection
Multiple rows can be selected in the Measurements grid through the following options: Once selected they can be added to a dimsheet as multiple entries.
1. Pick to select row and press and hold the Ctrl key and pick other measurements to add to the dim sheet.
2. Pick to select first row in a group and press and hold the Shift key and pick the last row in the group of adjacent measurements to add to the dimsheet.
3. Pick to select first row in a group and press and hold the Shift key and use the cursor down arrow to select the group of adjacent measurements to add to the dimsheet (using the cursor keys is the quickest way to select a number of adjacent items).
4. Press the Ctrl + A key to select everything in the Measurements grid to add to the dim sheet.
5. If a group of adjacent measurements has been selected, rows can be de-selected by pressing and holding the Ctrl key and picking the rows to deselect. The remaining measurements can be added to the dim sheet.
If dragging and dropping multiple rows, the Measurements grid content could be sorted prior to selection by clicking on the appropriate column header.
Dimsheet Times Column
The dimsheet Times column can be used to enter the number of times the contents of the value in the Dimension Column occurs.
Only a single 'timesing' value (and it can be negative) can be entered against the first dimension for each entry in the dimsheet.
The use of this column depends on how the measurement take off is being executed. If CADMeasure is being used to measure everything on the drawing then it is not necessary to enter anything in the Times column. If CADMeasure is being used to measure just one instance of a repetitive item then the number of times that item occurs can be entered in the Times column.
In the following example the Softwood Skirting to two Corridor sections have been measured individually and added to the dimsheet as they were different shaped corridors.
Whilst the length of skirting has actually been measured for Bedrooms 23, 21, 19, 24 and 18 (measures 13, 14, 16, 17 and 18 respectively) the values were virtually the same so a Times of 5 (for the five bedrooms) was applied to a single or typical bedroom dimension of 16.11m.
The more likely scenario is that the skirting would be measured for one bedroom and the number of similar bedrooms manually counted on the drawing and entered as a Times values avoiding the need to measure every bedroom.
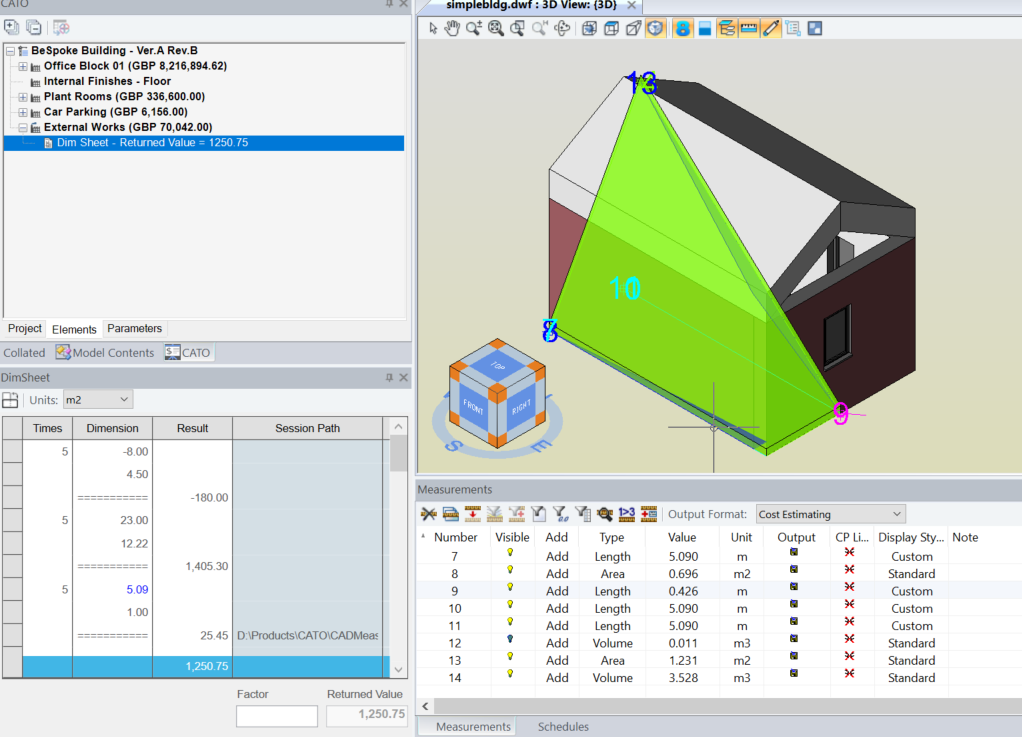
Example of the use of the Times column.
An further alternative would be to measure each bedroom and then group the values in the Measurements grid and then drag and drop the group measurement, being the total value of skirting, and not apply a times value.
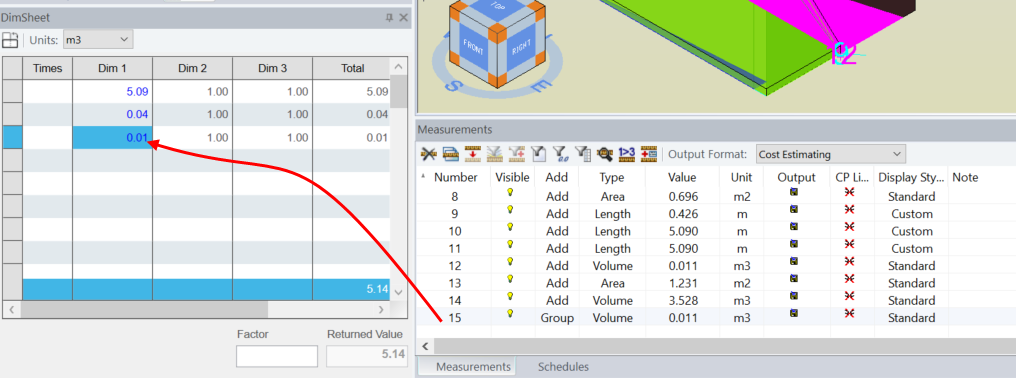
Example of using the Group option instead of the Times column
dimsheet Factor
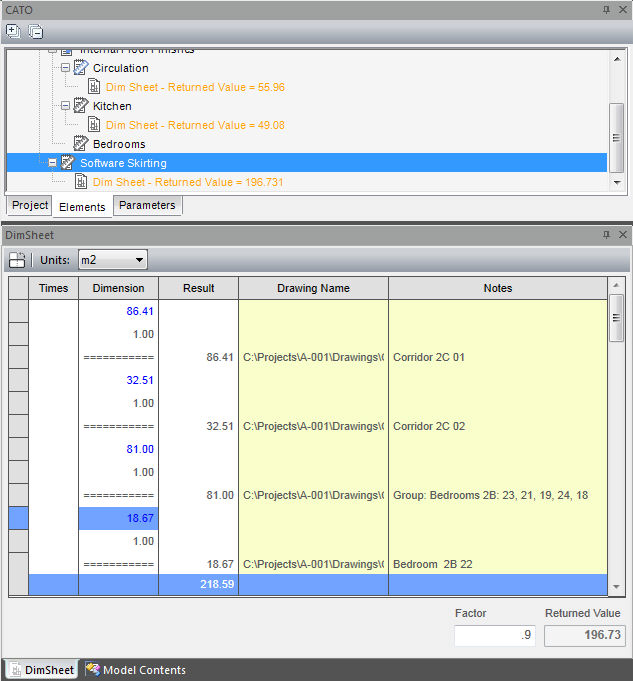
The Factor edit box adjacent to the Returned Value provides a means of applying a simple Factor to the extended total of all the items in the DIM sheet to increase or decrease the Returned Value.
For example, enter a Factor of 1.1 to add 10% to the dimsheet values to allow for wastage.
In the following example a 10% reduction has been made because the room perimeter measurements were created by duplicating the area measures and then changing the measurement type from Area to Linear in the Properties. As a result the perimeter measure includes the distance across any door openings and applying a factor value of .9 is attempting to take this 'over measure' into account.
Example of the use of the Factor feature
dimsheet Units and the Dimension Column
The number of dimensions required in the Dimension column of the dimsheet is based on the Units selected in the header.
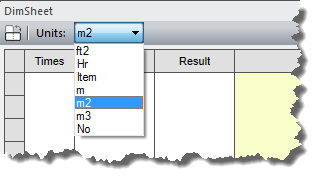
To set the Units for the dimsheet select the required unit from the drop down list in the dimsheet. The content of the Units drop down list is maintained in Causeway CATO Cost Planning module.
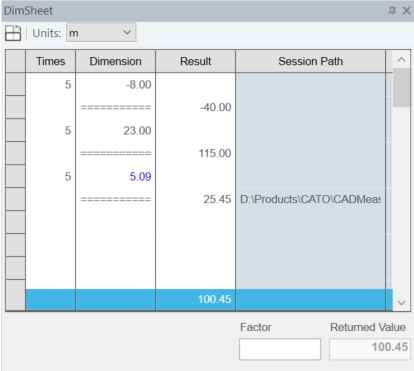
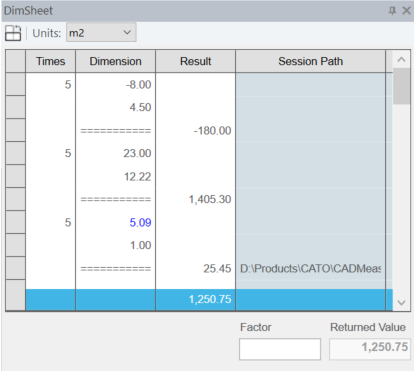
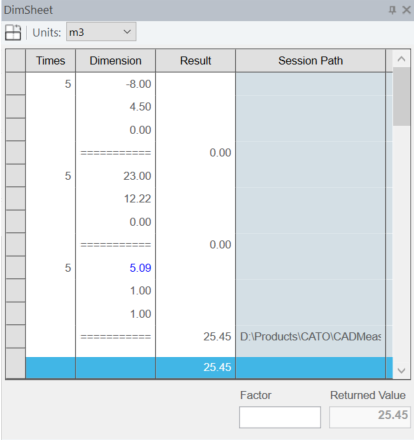
In the dimsheet, for Area and Volume measurements the first dimension is the area or volume value. The second and third dimensions, that would be multiplied out with the first dimension in manual measurement situations, are given a unit value.
If an attempt is made to add measurement type that has too many 'dimensions' for the Units specified for the dimsheet a message stating that 'The measurement unit exceeds the current dimsheet unit.'
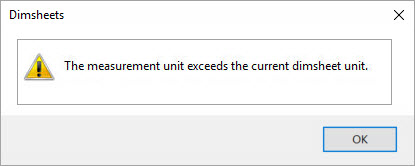
For example, attempting to add a volume measurement where the dimsheet Units are set to m2 (area).
Either change the dimsheet Unit to match the measurement unit or re-select a measurement of the correct type to add to the dimsheet.
The dimsheet Units can be changed retrospectively. If the Unit type is going 'down' (for example, from Volume to Area), the third, unit dimension is removed from the dimsheet. If the Unit type is going 'up' (for example, from Length to Area), an additional unit dimension is added to the dimsheet.
'Count' DIM sheets
Item or No. can be used as the Units for measuring the numbers of a particular item.
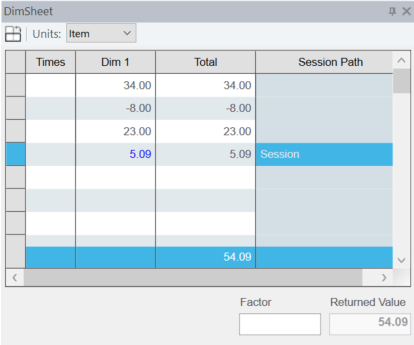
'Linear Length' DIM sheets
Units set to m (metre).
'Area' DIM sheets
Units set to m2 (metre squared).
'Volume' DIM sheets
Units set to m3 (metre cubed).
Vertical or Horizontal DIM Sheets
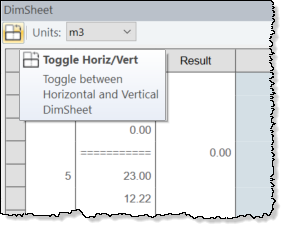
The display of the Dimensions in the dimsheet can be toggled between Vertical (i.e. the usual way in which measured quantities are presented) or Horizontal (i.e. in a spreadsheet format).
Click Toggle Horiz/Vert icon in the ribbon of the dimsheet to toggle between the two formats
The DIM Sheets formats can be mixed within an Cost Plan and will be reflected when viewing the DIM Sheets in Cost Planning. They can be toggled at any time. For more information, see Examples of DIM Sheet Types in Cost Planning and CADMeasure.