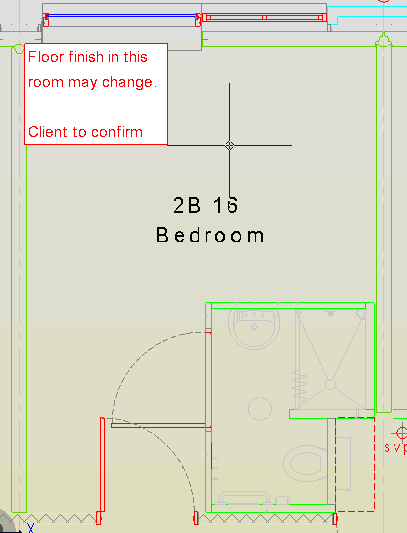
To place text on a Post-it markup note, perform the following steps:
1. Use Object Snaps if required.
2. Set the properties of the text such as font, size, colour etc. in the Fonts panel prior to placing the text.
3. Set the colour of the Post-it Note background via the Fill option in the Format panel prior to placing the Post-it.
4. Click the Post-it Note button ![]() on the Markup
panel of the Markup ribbon.
on the Markup
panel of the Markup ribbon.
5. On the drawing, pick a point for the location of the Post-it Note (the text will be left justified but centered on the point picked).
6. Start typing the text in the Post-it Note box displayed, it will grow as the text is typed.
7. Press the Return key to start new lines.
8. When the text is complete, pick a point in space to commit the text and add another Post-it at the point picked.
9. Perform any one of the following:
· Right-click to commit the text and end the Post-it Note command
· Press Esc to abort the placement of the Post-it Note
To edit the text,click on the Annotate <number> item in the Markup tree and edit the text value in the Properties panel.
Note: The Post-it Note and text within it will remain at constant size regardless of the zoom factor. The text placed via the Text markup feature will become smaller and larger as you zoom out of or into the drawing.
