You can either chose to use the standard questions provided and review the questions, or add your own buyer-specific questions for new topics.
Note: The question labels and the comments text support markdown formatting. For more information, see Using Markdown.
To add a new question to any of the sections in Supplier Management, perform the following steps:
1. Click Supplier Management Configuration > Supplier Sections from the Administration tab.
2. Click a section that is displayed on the left pane. For example, Bank Details.
3. Click the Add button at the top right of the page to add a question.
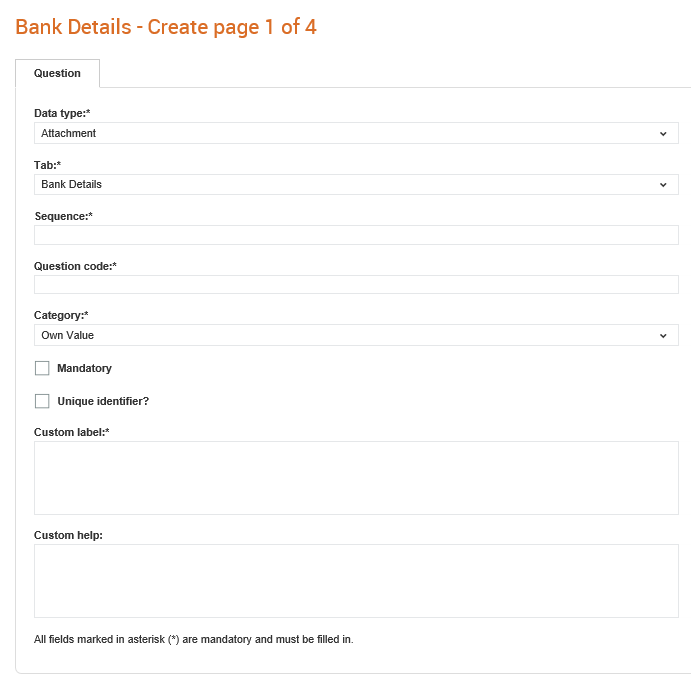
The following page is displayed if you have chosen the Bank Details section.
4. Enter or select the following details in the Questions section:
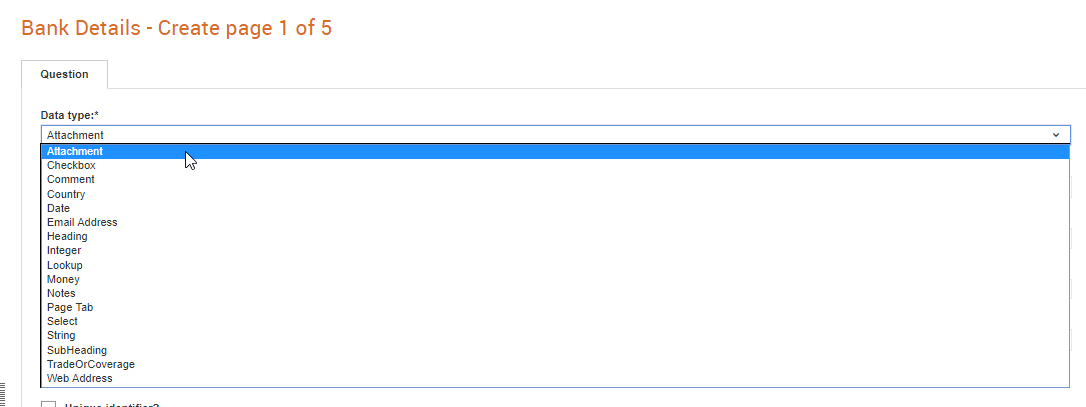
· Data type: Indicate whether the question is a check box, date, integer, select, or any other data type. For example, Country or Date. If it is a Select data type, then you can associate images with the options you provide. For more information, see Associating Images for a Select Data Type. You can also select Trade or Coverage to include it as a question type.
Tab: The sub-section of the form to which this field belongs to.
Sequence: The order in which the questions should appear.
Question code: A unique code to identify this question. Use a suitable naming convention to these questions for future reference.
Category: Select an option to specify how this question is shared in the system. If you are adding a new question the following rules apply:
o Own Value: This keeps the question in the form, but does not use the answer provided by the supplier for the common answer. The supplier would add a specific answer for your buying organisation. An example of this type of questions is ‘Key Contact’ where the value will be different for your organisation.
o Internal Only: This question is not to be seen by the buyer and can be used to store comments about the supplier that will only be seen by the buyer organisation.
Mandatory: Select this check box to make the question a mandatory one.
Require a future date: This check box appears if the Date option is selected in the Data type drop-down list. Select this check box so that only a future date is accepted. For more information, see Configuring the Date Fields.
Allow negative values: If you select Money as the Data type, this check box appears. Select the check box to allow negative values for the Money data type.
Use for create?: Select this check box to display this question in the supplier form.
Doc: Select this check box to specify whether a document is needed as an appointment.
Custom Label: Enter a label to display for the question.
Custom Help: The help file for this question.
Default value: The default value such as Yes or No.
5. Select the Show in List box if you wish to display the fields.
6. Select the Provide Link? box if you wish to provide a link.
7. Click the Show/Hide tab to set the fields to show and hide.
· When this option is selected?: Select Yes or No from the drop-down list based on which the show or hide properties will be set.
· Select the respective Show and Hide and Add or Remove options displayed
· Select an option from the Section drop-down list.
· Click Submit.
The Shown Fields and Hidden Fields display the options you have selected.