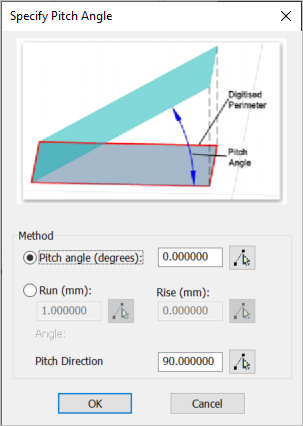
Pitched Area measures a defined area set at an angle (for example, a ramp) based on a plan footprint. The vertices can be linked by straight lines or arcs.
1. Ensure the appropriate Object Snaps are on.
2. Start the Command.
3. Pick the first point.

4. Pick the second and subsequent points.

5. At the Penultimate point, press the Enter key to close the measurement back to the start point.
The Specify Pitch Angle dialog box is displayed. The pitch angle is set either in degrees or by specifying the run (length) & rise (height), either by typing known values or picking points on a 3D drawing.

The pitch direction defines which way the slope is going. It is important to note where the measurement was started from as the first vertex is the reference point for pitch direction.
You can control whether the slope is upwards or downwards by reversing the direction (either change the angle by 180° or pick pitch direction points in the reverse direction.)
6. Click OK.
7. Enter a note if appropriate
8. The measurement will appear graphically on screen and in the measurements window with the relevant number.
For example, in the above screenshot, the first vertex is by the figure '1', the pitch angle was set as 5° and the pitch direction was set to 90°
This resulted in a ramp at 5° going down from the start vertex. Use the 3D orbit tool to see this.

If the direction was set to 180°, the ramp would appear to go upwards from the first vertex. Obviously the measured inclined area is the same in either case but it may avoid confusion if the 3D view looks correct.