To send an invoice to a customer, ensure that you have set up this customer as a trading partner in Tradex Portal.
After you enter the header and line details of an invoice, you can add an attachment. This attachment may be a work sheet or another document that supports the invoice. You must check with your trading partner before you add attachments to invoices. You can add more than one attachment to an invoice. For more information, see Adding Attachments after Creating Documents.
For information on adding discounts and charges to invoices, see Adding Discounts and Charges.
Depending on the configuration, the PO number might be validated or used to automatically add the legal entity to the invoice form.
Watch the following video on how you can create an invoice in Tradex Portal:
Note: If you want to add attachments to an invoice, you will need to purchase an optional module. For more information, contact the sales department.
To create and send an invoice, perform the following steps:
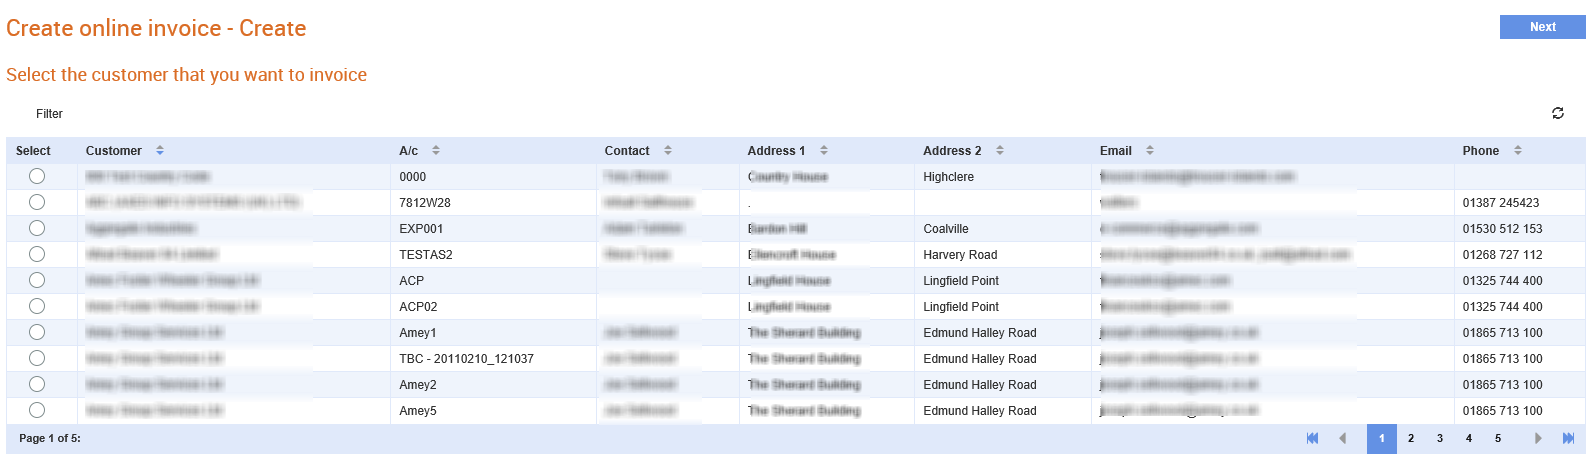
1. Click Invoices > Create online invoice from the Document Exchange tab.
A list of companies to whom you can send an invoice is displayed.
Note: These are companies that you have set as your trading partners. For example, when an invitation is accepted, the company’s name is displayed at the top of the list.
2. Select the company to which you want to send an invoice, and then click the Next button on top right of the page.
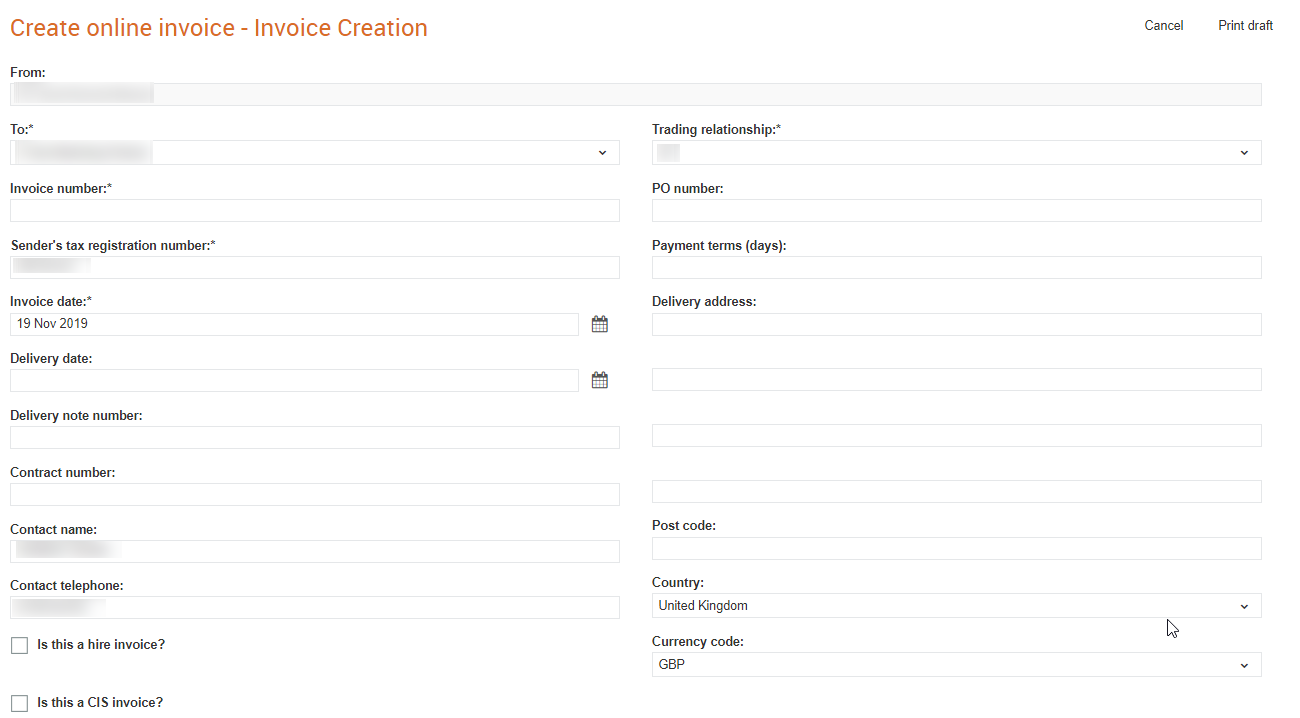
The Create online creation - Invoice Creation page is displayed.
Note: Only active trading customers are displayed in the list. If you want to view all the customers, contact your trading partner. If you have added many trading relationships, you turn off or turn on the relevant search filters.
3. Enter the required invoice details as described in the following table:
Note: The delivery address details are not populated automatically while creating invoices in Tradex Portal.
Field name |
Description |
To |
The trading partner to whom you are sending the invoice. |
Trading relationship |
Select a value from the drop-down list. This is the primary value that is used by the sender to identify the receiver |
Invoice number |
The invoice reference number. |
PO number |
The purchase order (PO) number that relates to this invoice. The PO numbers are compulsory and might be checked by Tradex Portal on behalf of the customer, as part of the transfer process. If the correct number is entered and the invoice gets rejected, contact your trading partner for assistance. |
Sender’s tax registration number |
The sender’s VAT number. This is automatically filled in from the database details, if it has been already set up. |
Payment terms (Days) |
The period allowed to pay off the amount due. |
Invoice Date |
The date of the invoice. Change the date if it is not the current date. Check with your customers before you make any changes to the date, as it may cause problems. |
Delivery Address |
The customer’s delivery address. |
Delivery Date |
The date of delivering the invoice. |
Delivery Note Number |
The reference number from the delivery note. |
Contract Number |
The reference number for the contract. |
Contact Name |
The contact name for your business. |
Post Code |
The customer’s post code. |
Contact Telephone |
The contact phone number for your business. |
Country |
The country of operations. |
Currency Code |
The currency code. For example, GBP. If you are using a currency other than GBP (for example, EUR) and if you don't see this currency in the drop-down list, contact Causeway Support. |
Is this a Hire Invoice? |
Select this check box if the invoice is for hiring a plant for a period of time. This adds the date period fields to the line details fields. |
Is this a CIS Invoice |
Select this check box to mark it as a CIS invoices. CIS invoices have an additional option when adding a line to distinguish between labour and materials. |
Notes |
A brief note about the invoice. |
Note: If data exists on the paper invoice, this data needs to be included in the electronic invoice too.
3. Select the Add discounts or changes check box to add discounts and charges details.
Note: Some customers may require only the line-level details. Check this before using this option.
4. Select the Save as a template check box if you want to reuse this invoice as a template.
5. Add the line-level details by clicking the Add Line option from the Action drop-down list in the Line Details section.
Note: An invoice must contain at least one line item.
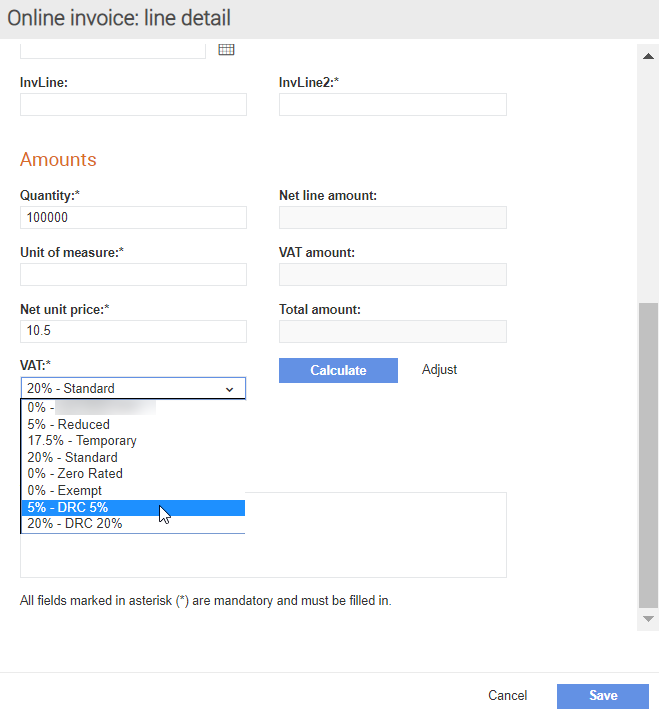
6. Enter the following line details:
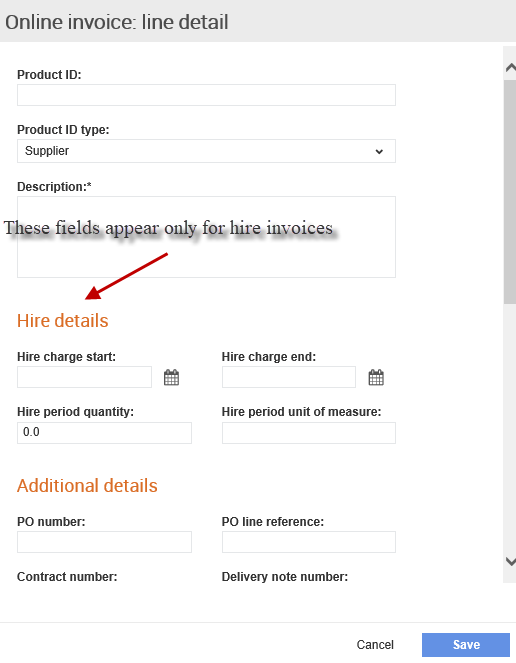
· Enter the Description using details provided in the PO.
· The Hire From Date and Hire To Date fields are displayed if you have selected the Is this a hire invoice? check box on the header page.
Note: Information entered at the header level (which applies to all line items such as PO Number) need not be re-entered within each line item. Do not use special characters such as £ or & in the fields.
· The Unit of Measure field is a free format field, though it is good to use standard codes such as EA (Each), PER (Per), TNE (Tonne), MTR (Metre), SQM (Square Metre), BOX (Box), HUR (Hour), DAY (Day), WEE (Week), etc. If none of these codes apply, enter 1 in this field.
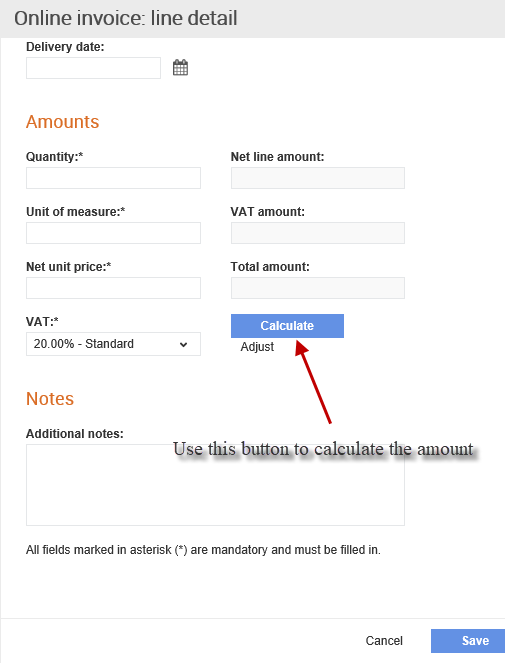
· Enter the Total Amount for the selected period in the Net Unit Price field for hire invoices. Alternatively, enter the number of days or weeks in the Quantity field and enter the daily or weekly price in the Net Unit Price field. The system does not automatically calculate the number of days or weeks from the dates.
· Select a VAT rate from the VAT drop-down list. If you want to enter a VAT rate different from the default rates displayed, such as Irish Standard, contact the Causeway Support team. If you are VAT registered and no VAT rates are displayed in the drop-down list, then you may need your VAT number added to Tradex Portal. To add your VAT number, contact Causeway Support. Do not enter invoices without the VAT number unless the items are zero rated or you are not VAT registered.
· Click the Calculate button to display the auto-calculated totals in the Net Line Amount, VAT Amount and Total Amount fields.
· Enter notes for the individual invoice lines in the Additional Notes box if required.
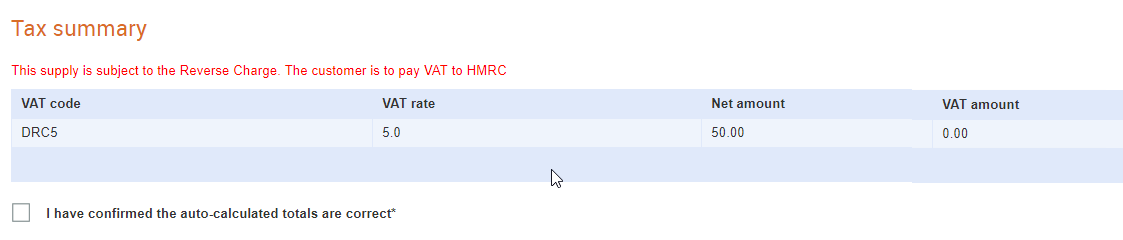
Note: When viewing a CIS invoice in Tradex in the HTML or in the PDF format, lines identify whether they are labour, or materials and the labour and materials totals are displayed.
When a CIS invoice is saved, the tax summary information is displayed, as in the following figure:
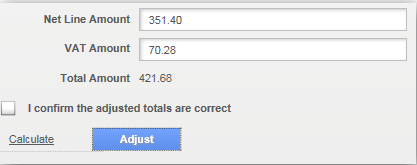
7. Click the Calculate button and do any of the following:
· If the calculated totals are correct, click the I confirm the calculated totals are correct check box.
· If the values displayed in any of the automatically generated fields are incorrect, click Adjust. You can then edit the totals within the limits set. This is usually to allow for small differences in the VAT amount calculated. After you finish editing the details, click the I confirm the adjusted totals are correct check box.
8. Click Save to complete and return to the header page to either add a new line item, or to complete the invoice. Else, select Cancel to discard the line item and return to the header page.
9. Click Add Attachment under Attachment Details to add one or more attachments.
10. Complete and submit the invoice by clicking the Submit button, or click Save to save the invoice and submit it later.
If you have saved an invoice, you can add attachments later and then submit the invoice.
When an invoice is submitted, a confirmation message is displayed, as shown in the following figure. Click OK in the confirmation message to confirm your invoice

At first, the invoice status is displayed as Not processed yet. Later, as the invoice is processed and sent to your trading partner, the invoice status changes.
You can also view the options to create another invoice, or exit this process and return to the Home page.